Monday, June 30, 2014

Spinach Bites with Mustard Dill Dip

Sundays are always our crazy days. We try to make them a family day that we will hang out and do fun activities, but our projects always get the best of us. Whether it's lawn work, cleanup from the rest of the weekend or running around and hanging out with friends and family, we never usually are sitting around having a relaxing, ho-hum day.

To our amazement, we recently got to enjoy one of the ho-hum Sundays. I didn't want to waste it in the kitchen, but I love having really fun food for days we're just hanging around so I usually make little appetizers and munchies (this usually puts me in the kitchen for a lot of the day, but I love being in the kitchen, so no complaints!).

Paul and I both wanted the same thing. A really good mustard. If you don't know this about me, I despise ketchup. I don't like the flavor. I don't even like the smell. I am a mustard girl. My haven is The Mustard Museum in Middleton, WI. Amazing place, amazing mustards ... all different types of mustards and from all over the world. It was there that I bought and proudly wear a shirt reading, 'Friends Don't Let Friends Eat Ketchup' and it shows a mustard bottle stomping on a ketchup bottle. Sorry, I digress ... the point is, we wanted mustard!


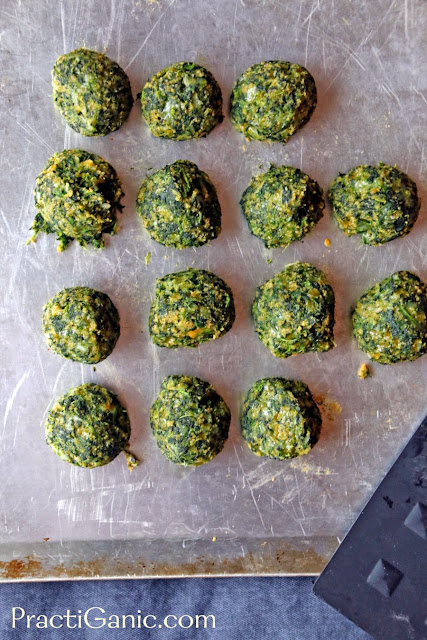
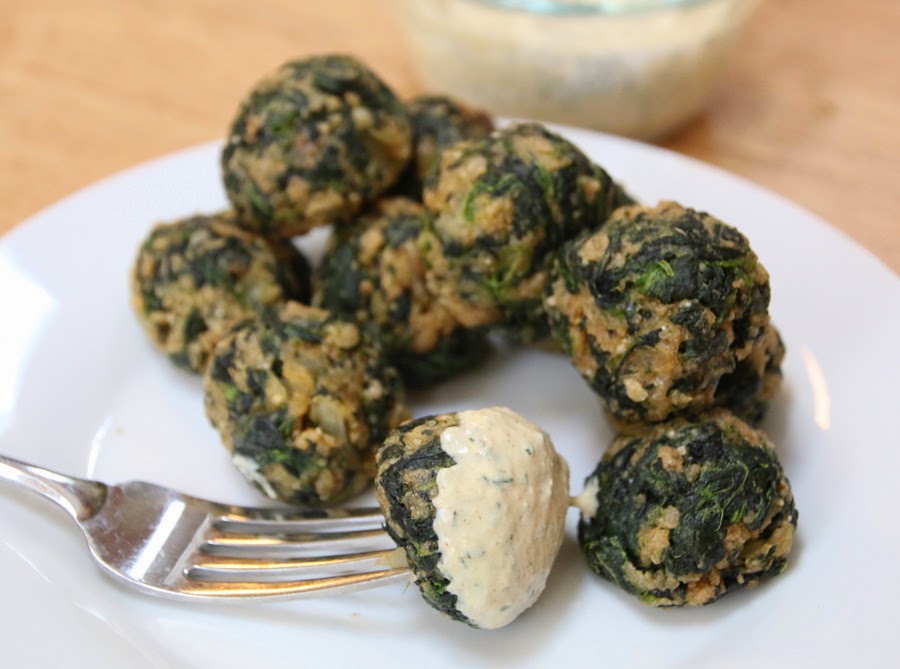
The first thing that came to my mind so that we could enjoy a good mustard was homemade pretzel bites, but I knew that would put me in the kitchen for a while. I stayed along those lines, but went a quicker route: Spinach Bites. I didn't want them to just be a smaller version of my Spinach Burgers so these have more cheese and egg and don't have beans or nuts in them. This makes them moister which is perfect for a little bite!

The only thing I did different the next time I made these was to make a double batch because the kids scarfed them down so fast that Paul and I only got a couple each! They even used the Mustard Dill Dip!


Spinach Bites

Makes 15 balls

1/3 c onion, chopped
2 cloves garlic, minced
2 T butter
10 oz frozen spinach
1 c breadcrumbs or rice chips
3/4 c cheddar cheese
1 egg
1/2 t salt
1/2 t pepper
1/4 t worsteshire sauce


Sauté onion and garlic in butter until onion begins to be translucent, about 3-4 minutes.

In a bowl, mix remaining ingredients. It helps if you get your hands in there and really get that spinach mixed around! Scoop into 1 in size balls and spread on a baking sheet. Bake at 375° for 15 minutes.


Spinach Bites

Spinach Bites

Mustard Dill Dip

3 T sour cream
3 T dijon mustard
1 t fresh dill, chopped

Mix your dip ingredients and serve when ready!

Spinach Balls

Friday, June 27, 2014

Broccoli Cheddar Patties

I am one of the lucky ones, my kids love their greens. Whether it be peas, green beans, spinach, kale chips or edamame they are eating it. However, their favorite is broccoli. I don't know if it's because they love the flavor or because we call them trees and they think they are big dinosaurs eating trees! Regardless of the reason, they love them and I love imaginations!

Our last CSA basket, we got a huge bag of beautiful broccoli. It was mostly florets with just an inch or two of stem on them. The stems have the most nutrition packed in them so when you get fresh broccoli, make sure you are utilizing them too!

It was a cooler, rainier week so I was thinking I would make a broccoli cheddar soup, but no matter how hard I try, I cannot get my kids to eat soup. I felt bad keeping all these 'trees' from them so I decided to pack the goodness of my soup into a form they would never turn down ... a burger or patty! I took all my ingredients that I would put in the soup but removed the stock and added breadcrumbs and an egg.

The kids got their trees and I got my broccoli cheddar goodness ... we were all winners!


Broccoli Cheddar Patties

Broccoli Cheddar Patties

Makes 8 patties

2 c (about 5 oz) broccoli, florets and stems
2 c shredded cheddar cheese
1/4 c nutritional yeast
1/2 c breadcrumbs or rice chips
2 eggs
1/4 c onion
1 1/2 T tamari
1/2 t salt
1/4 t pepper


Mix all ingredients together in a bowl. Take out half of the mixture and put in a food processor. Process it just a bit. It can still be chunky but by processing it, the mixture will stick together better.

Scoop out 1/4 c patties and place on a sprayed sheet pan.


Broccoli Cheddar Patties

Bake at 350° for 10 minutes. Flip and bake for another 5 minutes. These are great warm but I ate one cold too and it was still delicious!

Broccoli Cheddar Patties


Thursday, June 26, 2014

Fresh Lavender Lemonade

Is there anything better than the smell of lavender? Maybe new baby smell, but it's a close one! Lavender has such a calming and soothing smell, I will spray it on our pillows to help us sleep at night or just in the air at home to try to calm us all down. That doesn't always work, but it's still a great smell to have around the house.

Last year, I finally planted lavender in my yard and I am loving it. I will run my hands through the bush and just rub it on my arms it's so delicious! I dried it for the winter and used it in an occasional bread or muffin, but my favorite thing of all is Lavender Lemonade. Adding lavender to a bright sugary drink is probably not what you would usually think of when thinking of the calming properties of this plant but the combination is delightful! The light floral touch that the lavender gives the citrusy lemon tones down the drink and makes it even more refreshing. Plus, who can resist fresh squeezed lemonade?!


Lavender Lemonade

I make this for parties in big batches and it always goes so fast. When it's gone I put out a powdered mix of lemonade and I always feel guilty because the flavors are so different people don't really want to drink the lemonade anymore and I end up with a jug of powdery mix ... blah! I think I need to just say no more lemonade when the lavender runs out! When will I learn?

Lavender Lemonade

If you're not growing lavender yet, please start. Lavender plants are perennials and can withstand a lot of conditions but they like well-drained soil and full sun. A good plant can last around 10 years! It doesn't get that big so it's easy to find a place to squeeze it in your yard. People do grow them as a container plant too and bring them in the house in the winter. This will take a little more love but I think it's worth it. The more I think, the more I think I need to buy another container! I'll keep you posted! As for now, I hope you enjoy your lemonade.

Fresh Lavender Lemonade

Makes 2 1/2 cups

1 c water
5 or 6 sprigs of lavender; if you are using dried start with 1 teaspoon. You may have to adjust this depending on the potency of your lavender.
1/3 c sugar

1/3 c fresh squeezed lemon juice
1 1/4 ice cold water


In a sauce pan, bring to boil sugar, 1 c of water and lavender. Mix it around, helping the sugar dissolve. Once the sugar has dissolved, place it in the fridge to cool down.


Lavender Lemonade

When you're ready, add your lemon juice and more ice cold water.  Enjoy!!

Wednesday, June 25, 2014

The Importance of Pregnancy & Yoga

Lately, I have been having complete breakdowns. I don't know if it's the hormones or I'm just putting too much on my plate. The kids have been more unpleasant than I have ever known them. I knew something had to shift.

Yesterday, I decided to do a little less work and just focus on some good time with the kids. They have been really whiney lately and I think we needed some 'us time'. Don't get me wrong, I didn't entirely give up my work, I just refocused my energy and got the work done on the side (I still did 4 loads of laundry, vacuumed the house, made 8 pans of kale chips, weeded the garden and had a yummy dinner). 


When Savina went down for her nap, Gabe and I did yoga. After just 30 minutes that I took to do it, I realized what was missing in my days. The first thing that left my routine to get more things done had been yoga. What a terrible decision it was to cut yoga out of my day. The breathing helped me slow down and relax and the stretching helped my body get more energy. And watching Gabe do different yoga poses put a huge smile across both our faces!

The kids and I had a great day. I was completely refreshed. They still had their tears but I didn't have one! It was wonderful ... work still got done and we were all happier. Final decision ... more yoga, less stress!

Benefits of Yoga During Pregnancy

  • Increases circulation
  • Helps your muscles prepare for labor by stretching them while increasing flexibility and endurance. This can help decrease lower back pain that you get during later trimesters.
  • Reduces stress and anxiety
  • Helps you learn to focus on breathing 
  • Improves sleep

Find the Time

  • Take a class. 
  • Buy a prenatal yoga DVD
  • Watch a youtube video: There are tons of videos on the web that cater to your specific trimester and you can find one that is the right amount of time that you need ... or have! I like doing this because they are free and I can change it up every day. 
  • Print out a yoga cheat sheet. I found this at YogaLifeStyle.com. When the kids and I are playing outside or downstairs, I can bring this with me and get my time in while they are busy.

I have made a commitment to myself to get my daily yoga in ... not just for me, but for the sanity of the kids and the health and wellness of new baby! Plus, getting back in a routine now will only help me in sticking with it once new baby is here, helping me in post baby health and sanity. Wish me luck!

Monday, June 23, 2014

Homemade Natural No-Bake Playdough

Homemade Natural No-Bake Playdough
One of my Aunts has said, if there was only one toy that she could keep and had to get rid of everything else that she would keep Legos. They are great for all ages, genders and kids can use their imagination beyond belief.

For me, it is toss up ... I couldn't live without Legos or playdough! Playdough has turned into my in-home babysitter. The kids are completely occupied and content when I am trying to put together dinner or when I need a few minutes to get a project done. I love all the things that they build and what they talk about while they are doing it. My son, Gabriel, loves building lizards and then he sets out 'food' for them and pounds the lizard on the table so all the food sticks to their heads! It's adorable!!

I used to buy the store bought playdough. It is always cheap and seems to be everywhere. As the kids got more and more familiar with it, they began to test their boundaries ... what does it smell like and mostly, what does it taste like. This is how kids learn, right? Around Easter time, I began to be über aware of synthetic dyes and in kids food and basically everywhere. That's when I decided to start making Natural Dye for my Easter Eggs. Having the kids want to eat their playdough really bothered me. So, I actually threw the playdough away during nap time. I knew that I could make a better playdough that was free of synthetic dyes and unnatural ingredients.


Homemade Natural No-Bake Playdough

Gabe was so sad that his playdough was no where to be found so I knew that I had to make some in a hurry. I found an amazing site, The Imagination Tree, that had a million different playdough recipes and ideas (as well as other great learning toys and activities). I figured one out that I wanted to make with just a tweak here and there when I was making it. Also, with my experience with natural dyes for my Easter eggs, I knew I could dye them my way. The next day, Gabe and I made our playdough together. This turned out to be the highlight for me ... it was so fun to make together and he was not only excited to play with his new playdough, but tell everyone that he made it.

Now that I started making our playdough from scratch I think I can technically keep both, Legos and playdough! What do you think?

If you don't have any cream of tartar on hand, try this easy 5-minute playdough recipe!


Homemade Natural No-Bake Playdough

3 c AP flour
2 T canola oil
3/4 c salt
2 T cream of tartar
1 1/2 c boiling water

Mix all your ingredients then add your boiling water slowly. Stir it up and once it is cool enough to handle, knead it vigorously until it is no longer sticky. The first time I made this, I had to keep adding flour because it was so sticky. Don't be nervous to add a little more flour or water to get the right consistency. You can just leave your playdough white but I like to dye mine.


Natural Dyes:

  • Red: 1/2 c of boiling water + 1 raspberry tea bag
  • Yellow: 1/2 c boiling water + 1/4 t turmeric
  • Green: Squeeze the water from 10 oz of frozen spinach. Boil. (The green turns out to be more of a sage green than a bright vibrant green)
Depending on the amount of colors you decide to do, divide your flour mixture into separate bowls and add your colored water.

3 colors: Just over 1 1/3 cups of flour mixture + 1/2 c of dyed boiling water
2 colors: Just under 2 cups of flour mixture + 3/4 c of dyed boiling water

Playdough has a 6 month shelf life.

Other Playdough Ideas:

  • Add fresh herbs like basil, mint or lavender to add a fresh scent 
  • Add grains or oats for heightened sensory fun
  • I used to keep the playdough separate from the other toys so it wouldn't make a huge mess of the playdough (I know, I'm a control and neat freak ... I'm working on this). But now that the playdough is so easy to make, I will always have buttons, cookie cutters, straws, matchsticks and anything else on the table that they can build and use their imagination with. If it ruins the playdough, I simply make more!

Homemade Natural No-Bake Playdough

Saturday, June 21, 2014

Rhubarb Salsa

We enjoyed our last mason jar of salsa that I canned from last season. It was a sad but rewarding afternoon. It was awesome to get through the whole winter with never having to buy salsa, but now the sadness sets in as I realize I still have quite some time before my tomatoes are ready for harvesting.

I bought a jar of salsa last week when we had mexican. I can't believe how much I was already missing my garden fresh salsa ... can I go another month or so without it? Yes, I know I can buy tomatoes from the store and make fresh salsa, which I will do, but the tomatoes just don't have 'thee' flavor yet.

I had a little rhubarb left from the stalks that a friend gave us and decided to do a rhubarb salsa. I was as little nervous about the tartness of the rhubarb so I cut it with a little honey and it did just the trick! It wasn't too sweet, but not to tart either. It did have a good kick from the jalapeno, so make sure to add that to your liking.

I'm having so much more fun with my rhubarb this year than in years past. I feel like rhubarb generally equals sweets but it makes a great savory dish too. Last year, we got rhubarb in our CSA basket and I'm waiting and saying a little prayer that we get some this year too. Rhubarb Salsa might be able to fill my salsa craving until my tomatoes come in.


Don't forget to try Rhubarb Bruschetta with Goat Cheese too!

Rhubarb Salsa

Rhubarb Salsa

Makes 2 1/2 cups

1 1/2 c rhubarb, diced
1/4 c red onion, diced
1/2 c green pepper, diced
2 cloves garlic, minced
1 T cilantro, chopped
1 T jalapeno, minced
1 T olive oil
1 T fresh lime juice
1/2 T honey (or other sweetener)
1/2 t salt
1/4 t pepper

Mix all ingredients in a bowl. I like it best after it sits for an hour or two.


Rhubarb Salsa

Friday, June 20, 2014

Lemony Arugula and Egg Pizza

A couple months ago, we had a date night. We had grand plans to do dinner and a movie. Once we were at dinner, it was so nice to just sit and talk to each other, uninterrupted by our darling munchkins, that we decided to bag the movie and just keep talking. It was an amazingly relaxing evening and just the date night that we needed.

We went to an Italian place that we haven't been to in a years. I was really sad that the pizza that I usually loved was taken off of the menu. I almost asked the waiter if the chef would make it, but I decided to venture out and try a new pizza ... one with a cracked egg on it! Paul was a little hesitant, but I jumped right in. It was delicious. The egg was a little runny for him but the yoke gave every bite that it touched a really unique taste.

Fast forward to present day and I'm still thinking about that pizza so I decided to try one myself. We've been getting tons of wonderful arugula in our CSA bin and I thought what better to go with an egg pizza than arugula. The first time I made it, I was so nervous that the egg wasn't cooking so I kept messing with the temperature and opening and closing the oven. It turned out to be like a hard boiled egg! It was quite comical. I loved how the rest of the flavors turned out so I made another one the next night to try to get the egg right and it worked. Patience is key ... and leave the temperature and oven alone, it will cook!


Lemony Arugula and Egg Pizza

Paul's still a little hesitant about the runny yoke egg. He loves when I over cook the egg, but I love the yoke flavor. So even when I mess it up, it's still tasty, but don't forget the fresh lemon juice, that's the key to brightens the whole pizza!

Lemony Arugula and Egg Pizza

1 pizza crust
4 oz cream cheese
3 garlic cloves, minced
2 T parmesan, shredded or grated

1 1/2 c onion
2 T olive oil

2 oz arugula
1 c parmesan
1/2 c fresh mozzarella cut in small chunks ... I like using the ciliegine mozzarella
1 egg
1 T fresh lemon juice

Preheat oven for 425°

Mix together cream cheese, garlic cloves and 2 T parmesan. Set aside.

Caramelize your onions in the olive oil. When caramelizing onions, cook them 'low and slow' to get a nice golden brown color on them. Usually this means medium heat for 10 minutes.

On your pizza crust, spread your cream cheese sauce and top with onions. Bake for 5 minutes. Take the pizza out and top with arugula then parmesan and mozzarella.  Crack your egg in the middle and bake for another 7-9 minutes or until the egg is cooked.

Take out the pizza and drizzle the fresh lemon juice all over the pizza. Don't forget this step ... It competes the pizza in the most desirable way!


Lemony Arugula and Egg Pizza

Thursday, June 19, 2014

The Benefits of Raspberry Leaf Tea; Pregnancy and Beyond

Pregnancy & Raspberry Leaf TeaMy second pregnancy was a little rough on my back so I started getting prenatal massages to help out with my motion and the pressure. The masseuse was shocked that I wasn't drinking raspberry leaf tea. She informed me that it is great to drink before pregnancy to help strengthen your uterine muscles and tone your pelvic floor. This will help you have a smoother labor by relaxing the walls during contractions. It is also helpful after you deliver your baby to get the uterus and pelvic back to their normal stability.

I went home and did a little research and found this all to be very true. Where was this information for my first pregnancy? How did I not know about this? I also found out that when taken during pregnancy, red raspberry leaf is said to boost a mom's immune system, ease morning sickness and promote better circulation. Once new baby is here, some say raspberry leaf tea will assist with breast milk supply as well as help decrease bleeding.

Around the world, red raspberry leaf has been used to treat flu, diarrhea, relieve sore throats and aid in fertility. It is also used to lower the blood sugar of diabetic women, regulate irregular menstrual cycles, decrease heavy periods and lower blood pressure. So, having raspberry leaf tea in the house at all times, for all women is quite beneficial! I think I need to start buying it in bulk!


Where Can I Find It?

Don't be fooled when you see raspberry tea in the store, it is usually just raspberry flavoring (organic or not). You need to look for Red Raspberry Leaf Tea, it is just made with the leaves of the plant so it actually tastes more like a green, earthy tea than raspberries. Some health food stores will carry loose tea or you can buy it online at places like Mountain Rose Herbs. I have been able to find it in tea bag form at a few stores around my area by a brand called Traditional Medicinals.

How Much Should I Take?

When pregnant, you should drink a cup a day during your first trimester, two cups for second trimester and as much as 4 or 5 cups a day during your third trimester! This can be a lot of tea but as you know, when pregnant, we need to up our water supply so it's nice to have a water alternative. I also like to change up the way I drink the tea to add a little variety. Here's my favorite hot and cold tea drinks:

Hot Red Raspberry Leaf Tea
8 oz water
1 tea bag or 1 to 2 t of loose tea

slice of lemon (optional)
1 t honey (optional)

Bring water to almost a boil, add tea and let stand for about 7 minutes before enjoying.


Hot Red Raspberry Leaf Tea

Red Red Raspberry Leaf Spritzer
4 oz water
1 tea bag or 1 to 2 t of loose tea
4 oz sparkling water
1 lime slice
2-3 berries (I like using raspberries or strawberries the best)
2 mint leaves (optional)

Bring water to almost a boil, add tea and let stand for 5 minutes then put it in the fridge to cool.

Meanwhile, muddle your lime, berries and mint in a glass and add your sparkling water. Once your tea mixture is cool, remove the tea bag or loose leaf tea and add it your muddled concoction. Enjoy!

I will make a big batch of tea in the beginning of the week and leave it in the fridge so it's already cold and I can add it to my mixture when I'm ready for it.


Red Red Raspberry Leaf Spritzer

Wednesday, June 18, 2014

Creamy Asparagus and Artichoke Dip

Asparagus & Spinach Dip

I know that asparagus season is coming to an end but there is still some really great asparagus to be had so don't miss out. If you're finding okay looking asparagus, it's time to make some soup and dips with it.

I've been making asparagus dip a lot this spring. I don't know if it's the want for asparagus or a creamy dip but I'm enjoying it. Last weekend, I was going to make some to bring over to my parents house. As I was pulling the ingredients out of the fridge, I saw we had a container of artichokes that didn't get used from the night before and I decided to add it in. Artichokes, where have you been all spring?! This completely put the dip over the top of yumminess!

Spinach seems to be the go-to dip for artichokes. How many times have you seen or tried a Spinach and Artichoke Dip. Why not change it up and get some different greens in? Asparagus is the new spinach ... at least for this dip!


Creamy Asparagus and Artichoke Dip

Makes 2 1/2 cups
Asparagus and Artichoke Dip
2 c asparagus, chopped
1 c artichokes, drained and squeezed
1/2 c shredded asiago or parmesan cheese
8 oz cream cheese
2 garlic clove, chopped
1 t fresh lemon juice
1/2 t salt
1/2 t pepper

Sauté asparagus in a little olive oil until it done, about 3-4 minutes.

Put all ingredients into your food processor and blend until they are mixed but still a little chunky.

Serve as is or put in a oven safe dish, like a ramekin, and bake at 350°for 10-12 minutes.


Asparagus and Artichoke Dip

Tuesday, June 17, 2014

Rhubarb Bruschetta with Goat Cheese

I have never been huge rhubarb fan. I have never wanted to plant it because I never thought I would get good use out of it. In the past few years we have been given rhubarb from friends as well as our CSA. I can't turn down fresh ingredients, so I had to find a way to like rhubarb. Since I'm not a big sweets girl, I figured I could try some savory dishes and see if that helped.

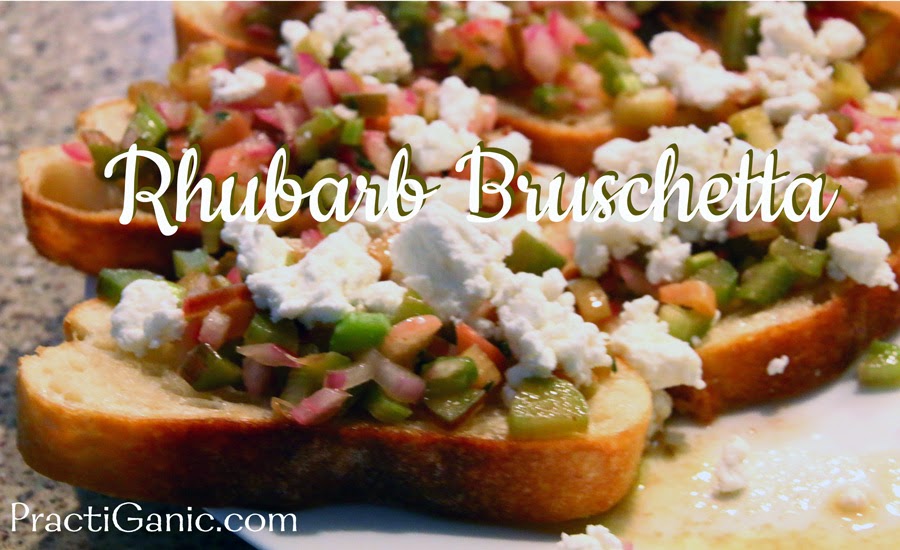
Well, I have not only changed my idea on rhubarb (and also my mothers) but I am finally planting my own rhubarb in the yard! Rhubarb Bruschetta with Goat Cheese was one of my big game changers. The honey calms down the tartness of the rhubarb and the creamy goat cheese makes the whole bite just melt in your mouth!


Rhubarb Bruschetta with Goat Cheese

Rhubarb Bruschetta with Goat Cheese 

Makes 10-12 (depending on how wide your baguette is)

2 cups rhubarb, small diced
1/2 c red onion, small diced
2 T olive oil
1 T balsamic vinegar (I like using a fruity balsamic like peach or strawberry)
1 t fresh lemon juice
1 t honey
1 t red wine vinegar
1 t fresh thyme, chopped
1/2 t salt
1/2 t dry mustard

4 oz crumbled goat cheese
10-12 slices of a sourdough or french baguette

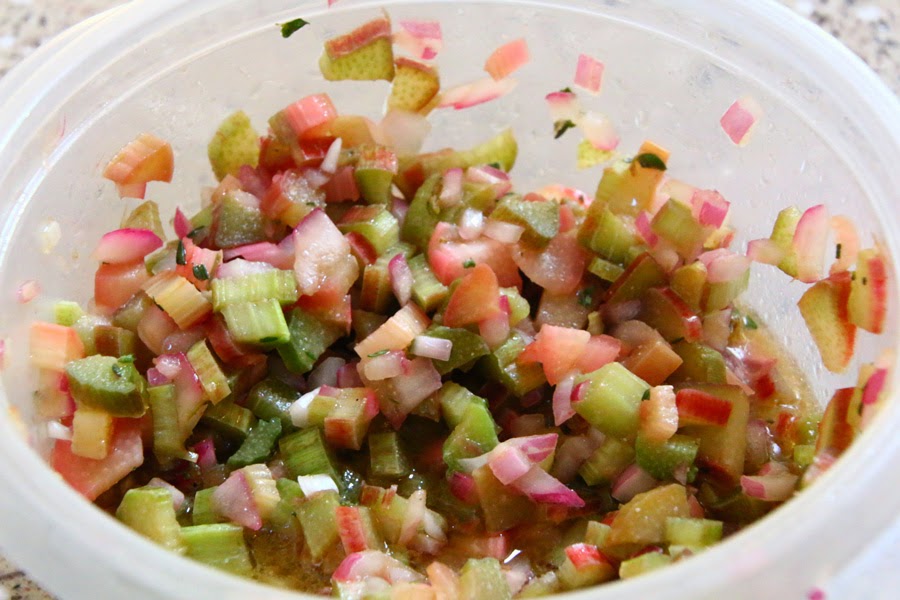
Mix all the bruschetta ingredients together, except for the goat cheese. Let sit in the fridge for an hour or so to let the flavors come together.


Rhubarb Bruschetta

Meanwhile, place your sliced baguette pieces on a pan and drizzle them with a little olive oil. Bake them at 325° for 8-10 minutes turning them over halfway through. They should be nice and crispy but a little chewy in the middle. If you like them more crispy, leave them in the oven.

Toasted Baguette

When you are ready to serve them, scoop the bruschetta filling on the baguette and  top with goat cheese. Enjoy!


Monday, June 16, 2014

Orange and Parsnip Muffins

Orange and Parsnip MuffinsA gluten free friend of mine recently had a beautiful baby boy and I was going to visit them in the hospital. I thought muffins would be the perfect treat for her. I also had a parsnip sitting in my fridge that needed to get used. I don't know what it is about parsnips ... I love their flavor, so I buy them sporadically but never seem to want to use them when they are in the fridge. I found a recipe in a cookbook that I have called Carrot Bread with Orange Frosting.

The recipe sounded pretty decent and I knew I could substitute the carrot with parsnip ... and the regular flour with gluten free flour ... and I wanted a banana in there ... and I didn't want frosting so I did a glaze. When I was done, the recipe was totally different and I was getting a bit nervous that they would even turn out. God was on my side, because they turned out great. However, I ran into one little problem. I left them at home so my friend didn't even get to try them!


Orange Parsnip Muffins

Makes 10-12 muffins

1/2 c coconut flour
1/2 c garbanzo bean flour
1 T baking powder
1 t cinnamon
1 t ground ginger

1/2 c coconut oil
1/4 c almond milk
1 banana
1/2 c brown sugar
2 T orange juice
2 c parsnip, shredded

Glaze:
1/2 c powdered sugar
2 t orange juice

In a bowl, mix flours, baking powder, cinnamon and ginger.

In another bowl whip coconut oil, almond milk, banana , sugar and orange juice. Then add your dry ingredients and then the parsnip.

Bake at 350° in a sprayed and floured muffin pan for 35 minutes.

Meanwhile, mix together the glaze. Once the muffins are cooled, drizzle it on.


Orange and Parsnip Muffins

Saturday, June 14, 2014

Grow the Perfect Herb Garden

I don't know what I would do without my herb garden. It supplies us with fresh, tasty treats and if taken care of will keep giving us the fresh garden goodness all year long. It took me a few years to really get keep my herbs growing good and producing the way they should. Truth be told, I still have a hard time with cilantro though and it drives me crazy! However, I keep trying it every year and one of these years, I will master that plant!

Grow the Perfect Herb Garden

In my herb growing experience, I feel like I have learned more about what not to do, than what I should do! But, in learning how to kill a  plant, I have learned how to keep them alive as well as be fruitful. Herbs can be the best part of your garden, so whether you have a garden to grow them in or just a few planters, start today!  Here are a few things I've learned along the way and I hope you get your herb garden growing and if you already have one, keep expanding it. 

Tips

  1. Good soil with good drainage.
  2. Keep them close. I've found that the closer your herb garden is to the kitchen, the more it will get used.
  3. Know your herbs. Herbs don't take much maintenance, so make sure you are properly pruning and also watering them on a good schedule.

Culinary Herbs

Common Mistakes

  1. Not pruning enough. With herbs, it's best to harvest, harvest, harvest! You should not let your herbs go to flower ... this is when they stop growing. Each herb has a different place where it should be picked and pruned to allow for continual growth. 
  2. Not watering properly. Make sure you know your soil. Many times you may think your herbs are really dry by looking at the soil, but just under the surface is rich, moist soil. Mulching your herbs helps a lot. It's also good to water just the soil and not the leaves. Watering the leaves can cause mold and mildew.
  3. Planting in the wrong spot. Most herbs like a lot of sunshine. I like planting my herbs by the kitchen so that I can quickly snip them while I'm cooking. Some herbs, like chives and chamomile, flower and attract bees, I plant these out in the yard. Some herbs, like mint and lemon balm, are very invasive so make sure those are planted in a secluded area so they don't take over other herbs and can grow as the years go by!
  4. Seed vs Plants. If you're a beginning gardener, buy your herbs. Growing from seed when you don't know what to expect adds a whole new level of detail and difficulty. Baby steps are the key for enjoyment!

What Can I Do With All My Herbs?

  1. I know this goes without saying, but cook with them! Add a little fresh flavor to every meal.
  2. Herb Infused Oils
  3. Dry or freeze them for future use. I like freezing my chives but I dry the my other herbs. Some people like putting fresh basil and other leafy herbs in ice cube trays and filling the trays with water to freeze them. 
  4. Infuse olive oils. Simply add 1 cup of fresh, chopped herbs in a quart size mason jar. Fill it to the top with olive oil and keep it in a cool dark place for two weeks. After that, strain your herbs out and use the oils all year long!
  5. Make sauces to can or freeze. I plant a couple basil plants so that I can make pesto for the entire winter. I make a batch every week or two and put it in ice cube trays to freeze so that I have perfect 1 ounce cubes of pesto whenever I need them.
  6. Add them to your drinks. I love putting basil, mint or lemon balm into my water with a little muddled fruit. It's so bright and refreshing. Another favorite is to make your lemonade with fresh lavender water! Steep lavender in hot water for 5 minutes and cool it down. Then use that water to make your favorite lemonade! 

My Favorite Culinary Herbs

Water properly, preferably not with orange juice!
  • Basil
  • Chives (perennial)
  • Cilantro
  • Lavender
  • Lemon Balm (perennial)
  • Lovage (perennial)
  • Mint (perennial)
  • Oregano (perennial)
  • Parsley
  • Rosemary
  • Sage
  • Thyme


Friday, June 13, 2014

The Perfect Hummus

Hummus RecipeHummus is a staple in our house. I feel like we always have some in the fridge. It is a quick snack and sometimes even a meal! We eat it as a dip, as a sandwich spread, heck, I've even used it as a pizza sauce! It's the perfect go-to belly filler.

Most people prefer to buy the store bought hummus, probably because of pure convenience. Next time you are at the store or if you even have some in the fridge, you'll notice that usually the second ingredient is water. If you've ever made hummus before or have read through homemade hummus recipes ... there is never water as an ingredient! Manufacturers  just want their hummus to go further without spending the money!


Alright, so there's a million hummus recipes out there! Well, there's a million recipes of everything out there, but back to hummus. There are so many variations too. I prefer my mine really smooth. I don't like the chunky beans and I don't want it to be too thick ... so that's what you're getting with this recipe. This is my standard hummus recipe. From here, you can take it anywhere! Eat it just like the recipe says or add some more ingredients to spice it your way. Here's a few of my favorites

  • jalapenos for a spicy hummus
  • kalamata olives
  • fresh dill
  • extra garlic
  • sun-dried tomatoes and pine nuts
  • roasted red peppers (make sure you give them a good squeeze so your hummus isn't too runny)

Whatever you decide to do, don't pay for watered down hummus and try to make your hummus homemade ... because everything is better homemade!


Hummus

Makes 2 1/2 cups

2 cans garbanzo beans, drained and rinsed
3/4 c olive oil
1/3 c fresh lemon juice
1 T tahini
3 garlic cloves, minced
1/2 t salt
1/4 t pepper
1/4 t paprika

Mix all ingredients in your food processor and blend until nice and smooth.


Thursday, June 12, 2014

Decorate Your Fireplace in Summer

In the early spring, we threw an engagement party for Paul's brother and our new sister-in-law. We have a wood burning stove and I knew that since it was getting a little warmer outside, if we had a fire we would roast in the house with the extra people. I love the feeling of having a fire when we have a party ... it's such a great mood setter that just can't be matched!

What we decided to do was clean out the fireplace and set up a bunch of candles so that we could still get that feeling of a fire. Not only did I love having a 'fire' going, but we got a ton of compliments too! Now that it's officially warm outside, I cleaned it out again and set it up to use for the whole summer.


Last night was a cool and rainy night. We lit the candles and I was so relaxed. ... having all the candles lit, listening to some good music and playing with the kids on the floor in the living room before bed, it was a great summer's night.

You don't necessarily have to do candles though. A few other ideas that you could do is to set up your fireplace with plants, a large mirror or even use it as a bookshelf! Whatever you decide to do, don't let your fireplace just sit there for the next few months but give it a little love and it will love you back!