Thursday, July 31, 2014

Cherry Rhubarb Mint Jam

I love making fresh jam for the kids. Okay okay, it's not just for the kids, I love it too. The idea first seems to be too much work but it is ridiculously easy to do and the taste of homemade jam is ALWAYS worth it! Plus, it's cheaper. I really don't see a downfall.

I had my last little bit of rhubarb left and was about to make some Rhubarb Bruschetta I remembered we were getting a box of cherries from our CSA so I decided to set it aside and save it for some fresh homemade jam!

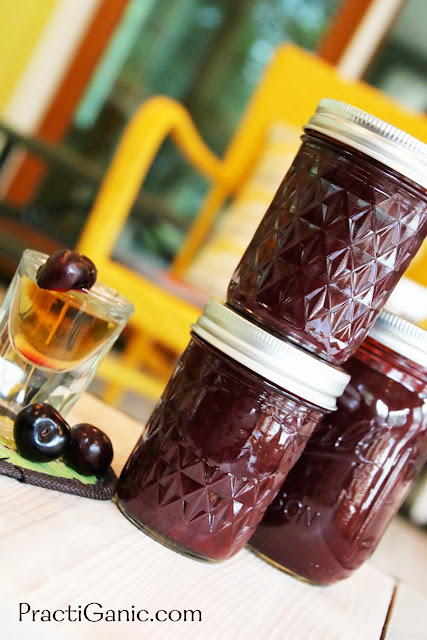
Cherry Rhubarb Mint Jam

After pitting 5 pounds of cherries and looking at the bowl of pits, I couldn't stop thinking of 'The Witches of Eastwick', a classic 80's movie with Jack Nicholson, Cher, Susan Sarandon and Michelle Pfeiffer. At one point of the movie, a few characters begin to spit up cherry seeds. Am I lone on tis one or can anyone else share this great movie memory?


The kids have already started downing the jam on their Peanut Butter and Jelly sandwiches as well as on their pancakes and fresh toast. It's a new house favorite! Don't forget to try my Cherry and Ginger Brandy Jam that I made too!


Cherry Rhubarb Mint Jam

Makes 4-5 8 oz jars

2 lbs sweet cherries
1/2 lb rhubarb, chopped
1 c sugar
1/2 c water
2 T lemon juice
1 t lemon zest
2 t pectin powder


Pit your cherries and set them aside. Bring your rhubarb and water to boil in a sauce pan. After 5 minutes, add your pitted cherries and remaining ingredients.

Cherry Rhubarb Mint Jam

Let simmer for another 20 minutes. Using an immersion blender, mix the jam so that it is smooth.

Pour into clean and sterile jars, leaving 1/4 in headspace. Make sure the rim and center lid are wiped down and screw the band on tight. The heat from the boiling jelly seals the jar and keep them in the refrigerator. If you want to save them on the shelf, put the jars in a hot water bath and process the jars in a boiling water canner for 10 minutes.

Cherry Rhubarb Mint Jam

Cherry and Ginger Brandy Jam

I like pairing jams with different brie appetizers or with cream cheese and hot peppers ... peanut butter can't have all the fun! Last year, I made a bourbon peach jam and i loved the flavors. The kids still got to enjoy the peach jam on occasion, but most of it I kept for appetizers.

We are offered different fruits through our CSA. They get them from another farm in Michigan and we can then purchase them for an additional cost. We pick them up with our weekly CSA. Could it be any more convenient?! This year, I am taking full advantage of all the fruit that they offer. Cherries last week, blueberries this week, I'm sure we'll get peaches again and we'll see what else they have for us!


Cherry Ginger Brandy Jam

I was going back and forth with what type of jam to make with all these cherries. I figured I would split the fun and make one for me and one for the kids. The kids get to enjoy Cherry Rhubarb Mint Jam and I get Cherry Brandy Jam. I was about to pour the Korbel in the mix when I saw the ginger brandy in the cupboard. I quickly changed gears and grabbed the ginger brandy and a little minced ginger out of the fridge. I'm so glad I did, the slight ginger flavor paired with the cherries perfectly!

Remember, the alcohol in the brandy cooks off so it is still okay to serve this one to the kids too.


Cherry and Ginger Brandy Jam

Makes 4-5 8 oz jars

3 lbs sweet cherries
1 c sugar
1/2 c ginger brandy
1 T lemon juice
1/2 T minced ginger
2 t pectin powder


Pit your cherries and put them in a sauce pan with your sugar and ginger brandy. After 5 minutes Add in your lemon juice, ginger and pectin powder.

Let simmer for another 20 minutes. Using an immersion blender, mix the jam so that it is smooth.

Pour into clean and sterile jars, l
eaving 1/4 in headspace. Make sure the rim and center lid are wiped down and screw the band on tight. The heat from the boiling jelly seals the jar and keep them in the refrigerator. If you want to save them on the shelf, put the jars in a hot water bath and process the jars in a boiling water canner for 10 minutes.

Cherry Ginger Brandy Jam

Wednesday, July 30, 2014

How To Make and Can Garlic Dill Pickles

How To Make and Can Garlic Dill Pickles

Nothing is worse than biting into a nice crispy pickle to find out that it's not nice and crispy or not the flavor you like! Personally, I do not like butter pickles at all. My pickles have to be crispy dill pickles! There's nothing better.

Last year was my first year canning. I grew up with my mom and aunts all canning, pickling, preserving ... the whole nine yards so it wasn't a foreign thing to me but now, I was on my own. Some things turned out and some didn't, but I learned a lot so just be brave and dive in ... it's easier than you think! I'm not going to lie, I'm still a little scared of the pressure cooker so I stick to the hot water bath method!


This year, I am canning with confidence and having so much fun. The main difference from last year to this year is I have my aunt's recipe. Thank you Aunt Chris, your pickles are always the best! Last year she canned over 500 jars of different fruits and vegetables! We'll just say she knows what she's doing. Almost every recipe that I have ever seen tells you to boil your brine then add it to your pickles. When I was reading her recipe, I was surprised to see a different method. With her method, you add all of the ingredients to your jar and just add boiling water! Easy peasy!! Her method is now my method and I hope yours too!

There are a few PLEASE DON'T FORGETS as you make pickles.
1. Cut the last 1/8 in of the pickle off where the flower was growing. Not the stem side but where the flower was. There is an enzyme in that part of the pickle that you don't want. It prohibits them from reaching full crispiness!

2.The second important thing I have learned is you must use canning salt. Don't try sea salt, kosher salt or any other of your favorite salts! I am one for always trying new ways of doing things or adding an extra ingredient or two but canning salt is the way to go, tried and true method ... don't stray from this one!

How To Make and Can Garlic Dill Pickles


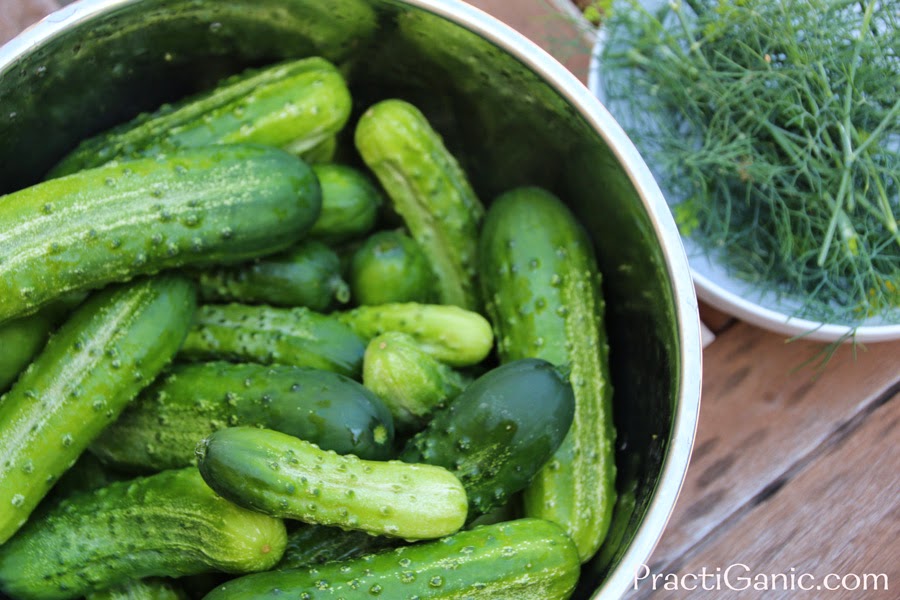
Fresh Pickling Cucumbers

Per Quart Size Jar:
3-4 garlic cloves
1 T canning salt
1 T brown sugar
1/2 c white vinnegar
2 sprigs of fresh dill seed (not dill weed)
1/2 t peppercorns
1/4 t red pepper flakes (optional)
boiling water

How To Make and Can Garlic Dill Pickles

Wash your pickles to get all the dirt off of them. Make sure to cut the last 1/8 inch of the pickle off where the flower was growing.

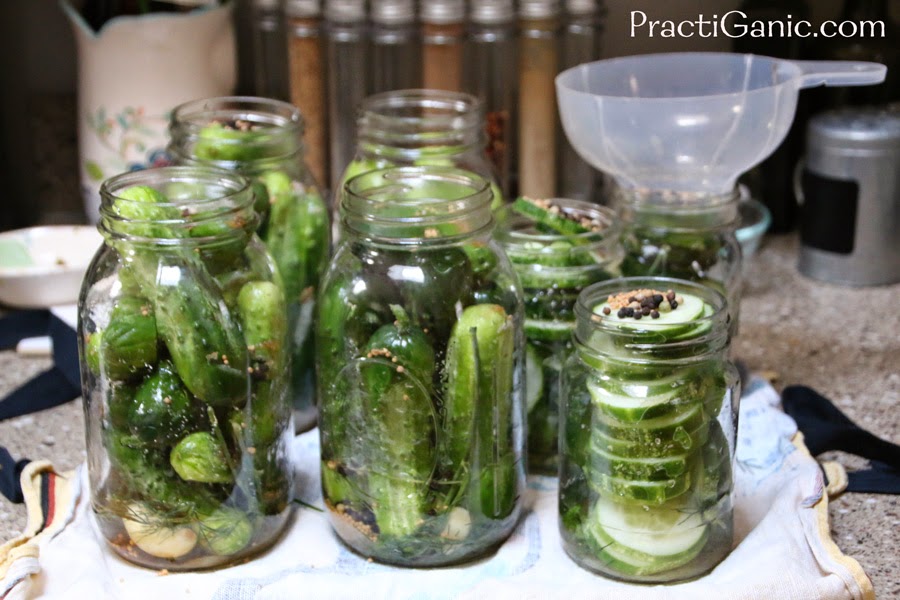
Pack clean and sterile jars with dill, garlic, salt, sugar, vinegar, dill, peppercorns and mustard seed. Next, pack in the cucumbers ... tightly, but without damaging or squishing them.

How To Make and Can Garlic Dill Pickles

Next add boiling water, not soft water, to a 1/2 inch from the top of the jar. Clean the rims of the jars then add lids and rings.

Process in a boiling water bath for 20 minutes. If you press the middle of the lid, it should have gone in, this means that they have sealed.

How To Make and Can Garlic Dill Pickles

Store your pickles and get ready to eat them in 3 weeks!

How To Make and Can Garlic Dill Pickles

Monday, July 28, 2014

Oh Sweet Broccoli Juice

We are huge broccoli lovers in this house so I usually have some in the fridge at all times. The past two weeks, we got broccoli in our CSA so we were on broccoli overload. I was pretty happy about that and so were the kids. However, even we were having a hard time going through it all. Obviously, this was a great problem to have.

I made two batches of Broccoli Cheddar Patties and the kids were having broccoli for their lunches almost every day. I had one bunch that didn't have another 24 hours of good life left in it. When it comes to that time in our produce's life, we juice! As much as we juice, I feel like I make the same juices all of the time and they don't have broccoli in them so I was excited for the change.


Broccoli Juice

'They' say that you should have 1/3 fruit to 2/3 vegetables for a good and healthy juice. I do a little more like 50/50! Maybe it's because we just like the sweeter juices or maybe we use really hearty greens in our juices so we need a little more fruit to balance it out ... I'm going to plead my case for the later conclusion! I think by doing it 50/50 you get a perfect mix of sweet greens. I also usually add a lemon or lime to our juices because it helps cut the uber earthy flavor of the greens. I highly recommend it but it is purely personal preference.

When it's time for the kids to wake up, I blast the blender so they can wake up to a tasty little treat ... they wake up a little happier that way! Amazingly enough, they didn't even want to try this juice! They just saw the broccoli out on the table and wanted to eat that plain. Strange kids! Oh well, more juice for Paul and I ... another good problem to have.


Oh Sweet Broccoli Juice

Makes about 5 cups

1 large head broccoli, stem and florets
1 c packed kale
1 orange
1/3 pineapple, about 10 oz, core and all
2 granny smith apples, cored
1 banana
juice of 1 lime (optional)


Broccoli Juice

Blend, blend, blend! Add ice, water or aloe vera juice to get the consistency you like.

Broccoli Juice
My broccoli lovers didn't want the juice, just the trees!


Friday, July 25, 2014

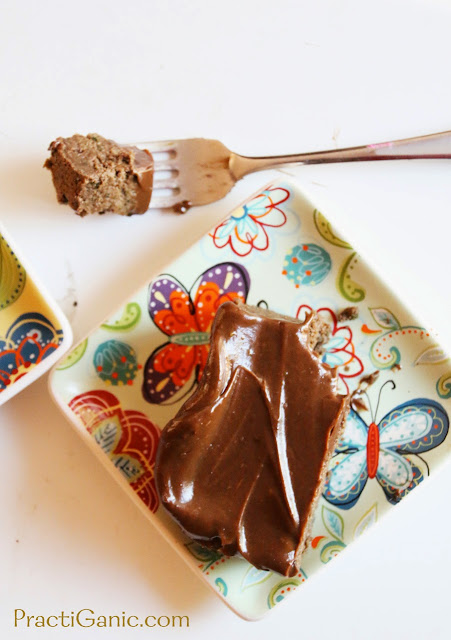
Green Machine Brownies: Kale, Zucchini and Avocado!

I have had a lot of zucchini lately which is never a problem. However, I have also had a ton of kale! I decided to add the two together and instead of making normal zucchini browning, I would try take out some of the zucchini and fill add some kale too. I'm not going to lie, I was a little nervous about this venture but excited at the same time.

The first batch I made had great flavor but they were the consistency was a bit crumbly. They were good enough to keep trying though! My second batch was a home run! I stuck with my normal avocado frosting for a few extra greens and a little more sweetness.


Green Machine Brownies

If avocado frosting is your thing, don't forget to try my Chocolate Black Bean Cupcakes with Green Avocado Frosting!


Green Machine Brownies

1 c kale, packed
1 c zucchini, shredded and squeezed
1 c coconut milk
1/2 c applesauce
1/3 c maple syrup or honey
1/4 c hemp or chia seeds
1/4 c coconut oil
1/2 T vanilla

1 c AP gluten-free or regular flour
1/2 c cocoa powder
1/4 c coconut flour
1/2 t salt
1.4 t baking soda


Frosting:

1 avocado
1 T vanilla
1/4 c coconut oil
1/4 c maple syrup or honey
1/4 t cinnamon


Preheat the oven for 350º.

In the food processor mix your kale, zucchini, coconut milk, applesauce, maple syrup, seeds, coconut oil and vanilla. It should be very smooth.

In another bowl, mix your dry ingredients. Slowly mix in your bright green wet mixture. Put into a sprayed 8x8 pan. Bake for 20 minutes or until you can put in a toothpick and it comes out clean. Let cook before frosting.

Mix your frosting ingredients with your food processor or immersion blender so that there are no avocado chunks and it is completely smooth. When the brownies have completely cooled. Frost away and enjoy!

I usually keep mine in the fridge, but it is not necessary.


Green Machine Brownies


DIY Nature Scavenger Hunt

Nature Scavenger HuntNot only is it a Friday, but it's another gorgeous day outside. Did I mention I'm also two days overdue. I need to get my mind off of baby and have some fun with the kids!

Today, we are going to go on a scavenger hunt! Luckily, we have a small woods surrounding our house but I think I might take them to a park as well to try to find some things. You can have a scavenger hunt wherever you are ... nature is all around us, even in the city!

Scavenger hunts are a great way to get the kids outside and engaged in a fun learning activity. Best of all, it's fun for all ages ... even parents! I print a few of my lists out (please feel free to print them out as well) and we run through the yard discovering and hunting.

If you and your kids haven't read the book, "We're Going on a Bear Hunt" by Michael Rosen ... it's about time! You will find yourself using the rhyming words over and over again on your hunt. The kids think it's hilarious and join in, 'We're going on a worm hunt, we're going to catch a big one ... What a beautiful day ...'

I love it, Savina will find one thing and hold onto it for the whole hunt while Gabe runs wild and brings back new treasure after new treasure putting them into the Scavenger Hunt Basket. When we are all done with the hunt, we go through our basket and talk about all the fun treasures we found that day.

Simply click on the Nature Scavenger Hunt list to print one out and start your very own scavenger hunt today! Have fun!!


Nature Scavenger Hunt
My Lil Scavengers!

Thursday, July 24, 2014

Easy Cheesy Hash Brown Muffins

Hash Brown MuffinsSo, today makes it one day past my due date. I've been doing good with the anticipation, but that is soon wearing thin. Let's get this baby out! The one nice thing about going late is I've had more time with my extra energy to get more things done. I'm known around my house as 'Stuff Done Smyczek' ... there's always stuff I need to do.

Lately, I have let that stuff go and just enjoyed extra time in the kitchen. I figured I might as well enjoy my last few days of energy doing things I love! Breakfast is definitely my favorite meal of the day, but lately I have been speeding right through it and moving on to other meals and snacks ... two days ago I made four desserts (baby has got to be coming soon, right!?!).

Yesterday, I realized I was missing a good breakfast so I decided to do breakfast for the next few days. I didn't want to do sweet muffins because let's face it, I had enough sweets in the house. I was craving eggs, bud I didn't want my Crustless Quiche Muffins either. I can't believe how picky I'm getting ... just make some muffins already! I remembered a few weeks back when I made hash brown muffins for a brunch and they went over great. Decision made. Perfect!

I was thrilled. These have been great for my quick breakfast. My belly is filled, my craving is satisfied and I can move on to getting more 'stuff done'. Now, just to get that baby out!


Hash Brown Muffins

Makes 12

2 c potatoes, shredded and squeezed
1 c cheddar cheese, shredded
1/4 c scallions, chopped
6 eggs
1/2 t salt
1/4 t pepper
1/4 t ground mustard


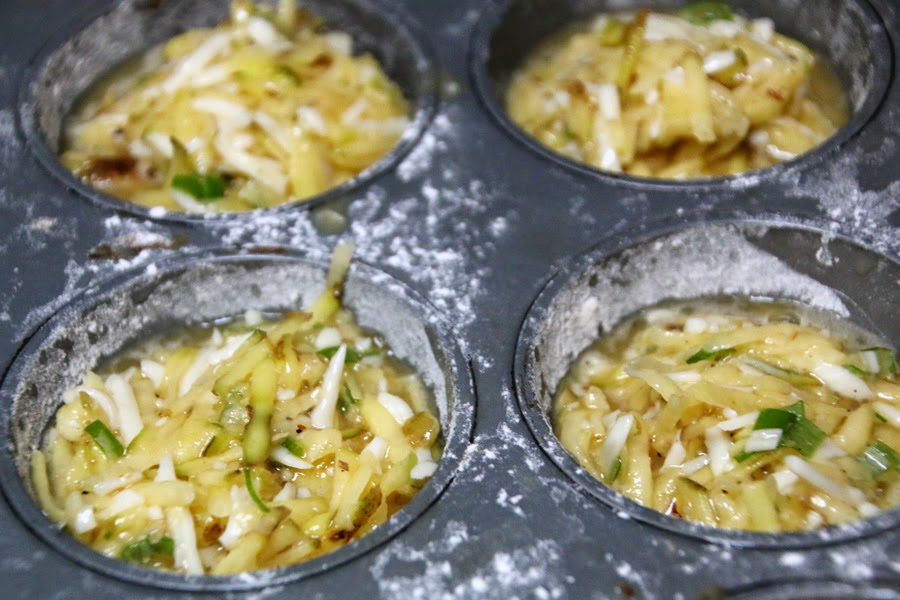
Beat eggs in a bowl. Add remaining ingredients and mix well.

Spray and heavily flour your muffin tin. I don't recommend liners ... I have used them before with this recipe and they always stick pretty badly! Fill your tins 3/4 of the way full.


Hash Brown Muffins

Bake at 375º for 30 minutes.

Hash Brown Muffins


Wednesday, July 23, 2014

Protein-Packed Cookie Dough Dip

Do you ever have those times when something or someone keeps popping up in your life? Recently, I had that happen with cookie dough. Seriously, it was haunting me!! I don't know if my sweet tooth was just getting the best of me, but I was either noticing cookie dough more or cookie dough was really haunting me. It was everywhere ... cookie dough ice cream, cookie dough Oreos, cookie dough frosting and then I had a conversation with someone about eating cookie dough!

That's it! It was time to make some cookie dough. I remembered a few years ago, my sister-in-law made a great chocolate chip cookie made with garbanzo beans. I knew, if you can make a cookie ... you can make the dough! Sure enough, I looked it up on the web and I wasn't crazy ... people have done it before. However, most of the dips were really smooth and creamy dips and I wanted it to have the texture and feel of actual cookie dough. I have been dipping just about anything in this dip and loving it! It's really great with strawberries, but I like it with a salty pretzel too!


Cookie Dough Dip

Protein-Packed Cookie Dough Dip

Makes 2 cups

1 can cannellini beans, drained and rinsed
1/2 c cashews, soaked for one hour
1/4 c coconut milk or other milk alternative
3 T honey or maple syrup
2 T coconut flour
1 t vanilla
1/4 t cinnamon
1/8 t salt
3 oz chocolate bar, broken into chunks ... use vegan, dark, milk or whatever your favorite chocolate is!


Put all ingredients except for the chocolate bar into your food processor and mix until smooth. Then, mix in chocolate bar by hand.

Serve with strawberries, banana chips, graham crackers, pretzeks or just get out a spoon and start digging in!

Tuesday, July 22, 2014

Beet Burgers

Beet BurgersI have found that beets are a tricky ingredient. Many people tell me that they don't like them but like anything, if they are prepared the right way they will win a few people over.

If you're one of those beet skeptics, try them out because of all of their great benefits. Beets are not only good for a high source of energy but they also contain trytophan which can relax our minds and is good for our mental health. Beets are also said to help prevent cancers because they help purify our blood. Did I say that they were packed with vitamins and minerals too? Okay, so now that you know that beets are worth the effort, try a beet burger!

Beet Burgers are one of those recipes that I have turned a few beet skeptics. My top beet takers are actually the kids! They love these burgers. The earthy beet flavor isn't that strong because of all the additional flavors that are packed in these!

Beet Burgers

Makes 6 burgers

2 c beets, shredded (I've used golden, white and red beets. All are delicious!
1/2 c zucchini, shredded and liquid squeezed out
1/2 c onion, diced
5 oz crumbled feta cheese (crumbled goat cheese is great too, but make sure it's already crumbled and not a block, the block doesn't work out as well)
1 c oats
1/2 c almond meal (or use AP Flour)
1 egg
1 T basil
1/2 t salt
1/4 t pepper


**Vegan option: Replace egg with an egg substitute of your choice and the cheese with tofu. Works great!!

Mix all ingredients together. Take half of the mixture and process in a food processor. This helps everything stick together better. Put back in the bowl with the rest of the mixture and let sit for at least a half hour so the oats can soak up the liquid. Scoop out 1/2 c burgers and place on a sprayed sheet tray.


Bake in the oven at 375º for 20 minutes. Flip and bake for another 10.

Beet Burgers

I like these topped with a few greens, caramelized onions, a little extra cheese and vegenaise. YUM!!

Beet Burgers

Monday, July 21, 2014

Roasted Vegetable Coconut Curry Quinoa

Monday's are my quinoa or pasta nights. I usually feel like the house is in complete disarray from the weekend and I spend more time on getting the house back to normalcy and less time in the kitchen.. After the weekend I also really want a home cooked meal and usually a hearty one. Quinoa and pasta are it! Easy to do, quick, filling and totally enjoyable. It's not about working smarter, not harder!

Roasted Vegetable Coconut Curry Quinoa

Curry is one of those dishes that I don't make much but when I do I always ask myself, 'Why don't I make this more?'. I love the flavor ... slightly sweet and slightly spicy. It's such a great combination! Plus, it's so quick and easy to make! I love this recipe because I use it as a side dish or by adding a protein it's a full on meal (especially if it's Monday). The curry mixture is a little spicy for the kids but it's perfect because I make them a few extra vegetables and some Baked Tofu Bites. Then, Paul and I can add the tofu onto our quinoa and it's a full on entrée. We're all happy and well fed. Happy Monday!

Roasted Vegetable Coconut Curry Quinoa

Serves 3-4 depending on if you're using it as an entrée or side

1 1/2 c broccoli, stems and florets
1 medium red pepper, cut in matchsticks
salt and pepper

1 c quinoa
1 c coconut milk, regular or light
1 c water
2 garlic cloves, minced
1 t ginger
1 t tumeric
1/2 t curry
1/2 t salt
1/2 t pepper
1 1/2 c bok choy (kale or spinach work well too)
1/4 c chives, chopped for garnish


Preheat oven for 375º.

Mix together chopped broccoli and red pepper and lightly oil and salt and pepper. Bake for 15 minutes.


Roasted Vegetable Coconut Curry Quinoa

Meanwhile, in a pot, mix together quinoa, water, coconut milk, garlic, ginger, turmeric, curry, salt and pepper and bring it to boil. Once it has boiled, turn the heat to low and cover until quinoa has soaked up the liquid and it is light and fluffy.

Roasted Vegetable Coconut Curry Quinoa

Mix your greens into the quinoa. The heat from the quinoa will wilt the greens just enough. 

Roasted Vegetable Coconut Curry Quinoa

Place quinoa on your plate and top with the roasted vegetables. If desired, top with your favorite protein ... I added  some Baked Tofu Bites below. Garnish with fresh chives.


Saturday, July 19, 2014

Garden Fresh Simple Syrups

DIY Simple SyrupsThe last few years, I always seem to be pregnant or nursing and I get sick of drinking water all of the time ... especially during parties. I love having a fun mocktail to sip on as well as have a fun cocktail for those who can ... and when I'm ready for that cocktail! For me, there's no better time than summer to sip on those fun drinks because of all the fresh ingredients. Many times, I simply muddle some fresh fruit with mint or lemon balm and add it to my water or club soda, but there are those special occasions that I go all out and make a simple syrup. Simple syrups are so fun to add to any drink and they are ridiculously quick and easy to make!

Here are some of my favorite syrups and fruit combinations ideas:

  • Cherry Lime (do the cherries as the recipe calls for and add 1 T of fresh lime juice after you strain the fruit.
  • Herbs! Use 10 leaves instead of 1 c of fruit. Basil, Chamomile and Mint make great syrups
  • Strawberry Rhubarb
  • Raspberry Blueberry
  • Vanilla: Use 1 vanilla bean instead of the fruit.

Garden Fresh Simple Syrups

Makes 1 1/4 - 1 1/2 cups depending on the fruit

1 cup water
1 cup sugar
1 cup chopped fruit


Bring water and sugar to boil so that sugar dissolves completely. Add in your chopped fruit and lower heat to medium heat and simmer for an additional 10 minutes. Strain fruit out and chill. Cover and keep refrigerated for up to 2 weeks.


DIY Simply Syrups
Rhubarb Simple Syrup
Add 1 or 2 oz of syrup per cup to your favorite mocktails and cocktails!

Garden Fresh Simple Syrups
Rhubarb Simple Syrup with Club Soda ... Cucumbers and Blueberries made it extra bright tasting!

Thursday, July 17, 2014

Thai Quinoa Salad

I am a coleslaw fanatic ... I love the perfect creaminess and dill of a good homemade slaw! But every now and again, I need to change it up and use my cabbage a little different. Thai Quinoa Salad is usually my go-to change up.

Thai Quinoa Salad

I like adding grains to different salads to change them up and also make them even heartier. A salad that you've been eating for years can change so quickly by adding one thing. This recipe more of a salad than a coleslaw but the cabbage gives it that great coleslaw crunch. Since we first eat with our eyes, all of the colors of the fresh vegetables really make this salad a big hit at parties. Because of this, I usually only add the red pepper flakes when I make it at home. The spice, which is a great touch, can be a little too much for those with sensitive taste buds. Luckily for this salad, there's a lot of flavor going on in the rest of the dressing so it can live without it.

Don't forget to try my Creamy Dill Coleslaw too!


Thai Quinoa Salad

Makes 8-9 cups

1 1/4 c quinoa
2 1/2 c water
2 1/2 c red or green cabbage, shredded
1 red pepper, diced
1 small red onion, diced
2 medium carrots, shredded
1/4 c mint
1/4 c cilantro
1/4 c scallions, diced
1/2 c peanuts or chopped almonds
1 c edamame


Dressing
1/4 c nut butter, I like using peanut or almond butter best but I've even used cashew butter before
1/4 c coconut oil
3 T tamari
3 cloves garlic, minced
2 T honey
1 T ginger, minced
1 T rice wine vinegar
1 t toasted sesame oil
1/4 t red pepper flakes, optional


First make the quinoa. Mix the water and quinoa in a pot and bring to boil. Once it comes to boil, lower the heat and cover. In 10-14 minutes the water should be soaked up and it will be nice and fluffy! Set it aside to cool.

In a bowl, whisk together the dressing ingredients. Add dressing to quinoa and mix.

In another bowl mix all of your salad ingredients. Add in your dressed quinoa dressing and mix well. Enjoy!

Thai Quinoa Salad

Wednesday, July 16, 2014

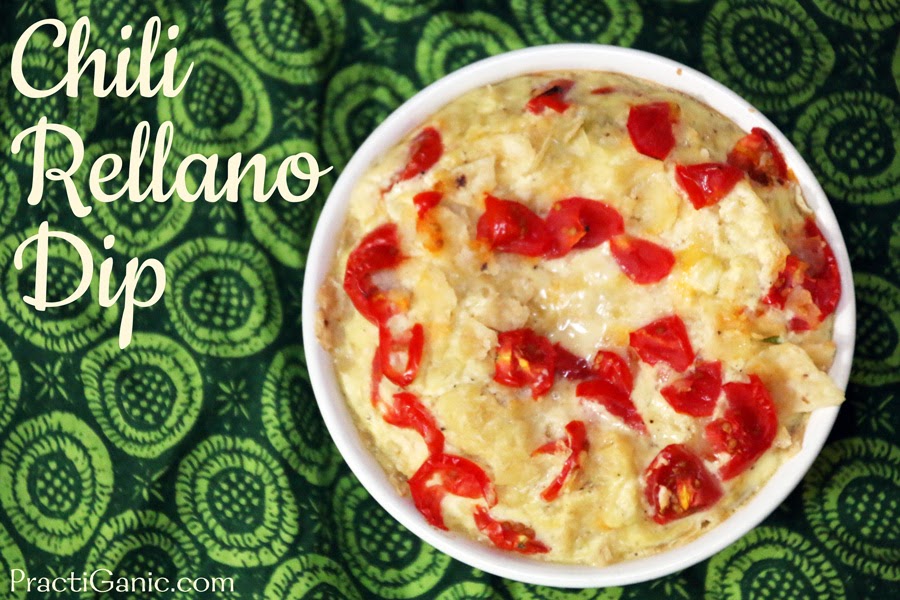
Chili Rellano Dip

Chili Rellano DipI am one of those people that can dip just about anything, even if it's not supposed to be dipped I think it tastes better on a chip or cracker. Paul often makes fun of me because when I talk about dipping something, I make a pecking movement with my hand like I have my own sign language for it ... I just get a little excited to dip! I'm sure I'm not the only one out there who can't resist a good dipping!

I couldn't decide what I wanted for dinner, enchiladas or chili rellanos. I would have had to go to the store to make the chili rellanos, so I opted for the enchiladas. Problem is, I couldn't stop thinking about how I wanted the chili rellanos. I decided to do an appetizer for us and make a quick dip. Aha! Curb my craving for the rellanos and I get to have a dip. I was so excited for dinner now!

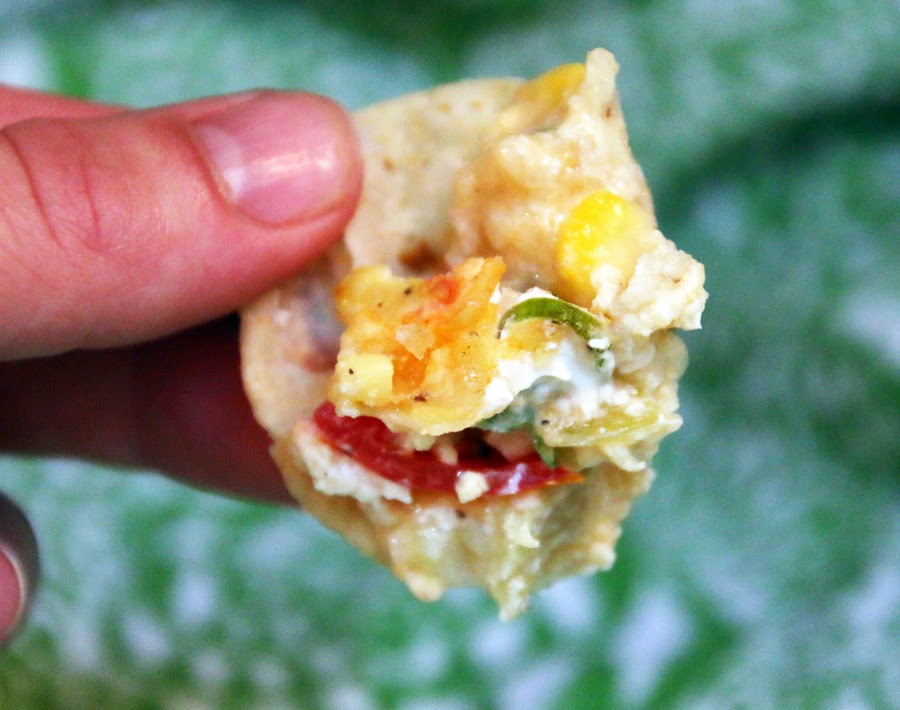
I was going back and forth about adding an egg to it but I wanted all the flavors of the rellanos in the dip so I went for it and it turned out great. When you pull it out of the oven, it is puffed up almost like a soufflé but when all is said and done, it is a perfect creamy dip guaranteed to curb your dip craving!


Chili Rellano Dip

Makes 1 1/2 c

1/2 c corn
1-4.5 oz can diced chilies
1 scallion, chopped
1/2 c cheddar cheese, shredded
2 oz cream cheese
1 egg
1/4 c milk
1/4 t salt
1/4 t pepper

3 T tortilla chips, crushed
3 cherry tomatoes, diced


Mix corn, chilies, scallions, cheddar, cream cheese, egg, milk, salt and pepper in a bowl. Place in an oven safe dish, I like using a ramekin. Top with tortilla chips and tomatoes.

Bake at 400º for 35-40 minutes. It will puff up like a soufflé but once it sits and cools for a few minutes it will come down.

Chili Rellano Dip

Tuesday, July 15, 2014

Brandy Barbecue Sauce

In my young life, I have learned that you can't get a good Old Fashioned outside of Wisconsin. I'm sorry rest of the world, but it's true. I also worked as a bartender for a number of years where I learned a few things about brandy ... one of them being Wisconsin drinks more brandy than any other state. Korbel has once said that Wisconsin gets 1/3 of their yearly supply. There are also a few smaller brandy companies that have almost gone out of business but Wisconsin keeps them running. Is this something to be proud of? Why not ... Go Wisconsin!


Brandy Barbecue Sauce

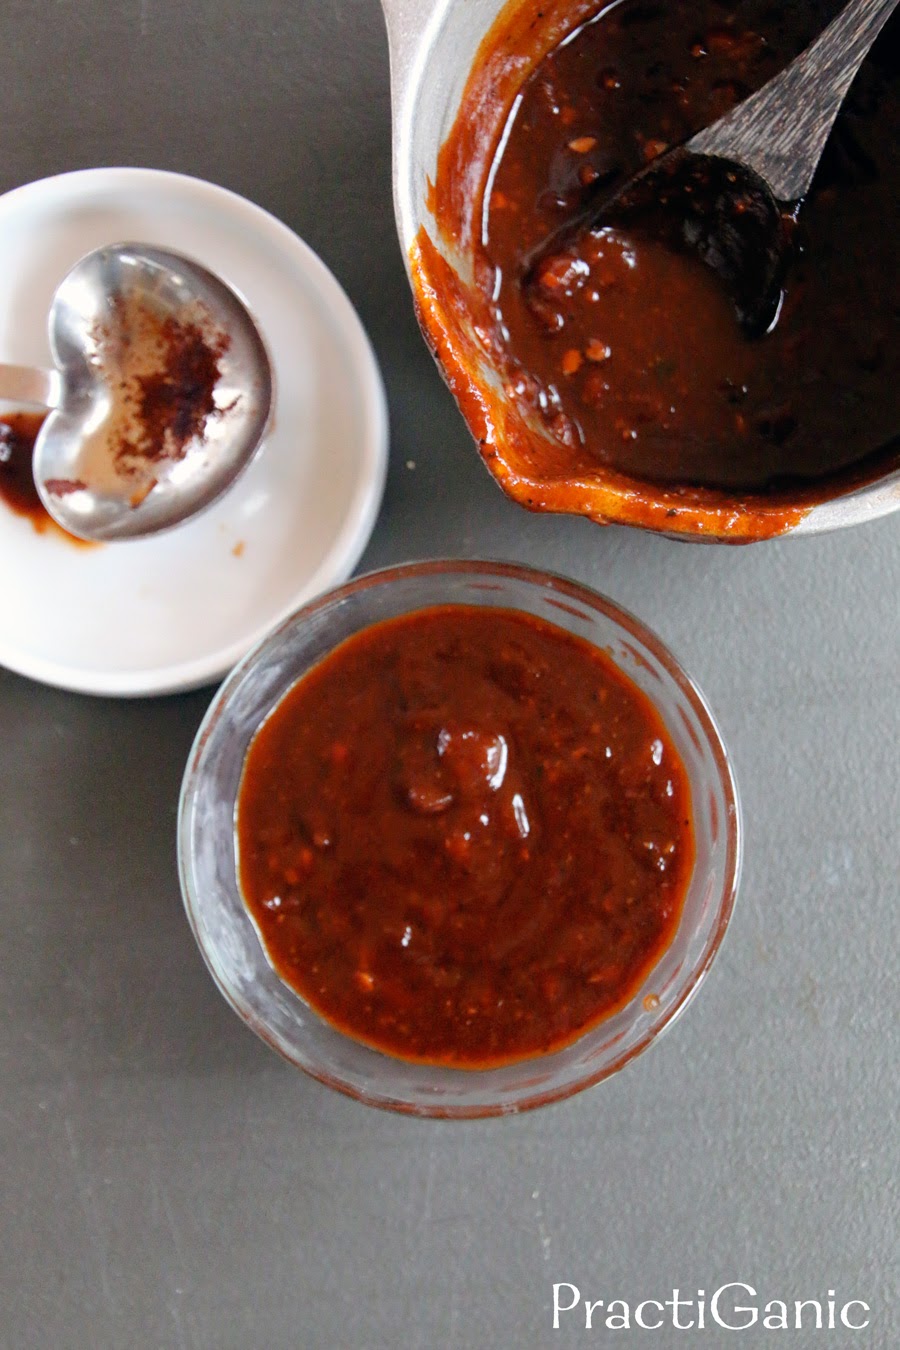
Many barbecue recipes use whiskey, but being in the land where brandy is our milk and honey, I use brandy. I think the flavor profile goes much better as a sauce too. In my opinion, it's a little smoother, sweeter and caramel-like. I have used this sauce on everything from tofu, to beans, tempeh, mushrooms and even chicken and pulled-pork for the meat eaters in my life.

Need a gluten free barbecue sauce? Don't forget to try Lentil Barbecue!


Brandy Barbecue Sauce

Makes 1 1/2 cups

1/2 onion, diced
3 cloves garlic, minced
3/4 c ketchup
1/2 c brandy
1/4 c brown sugar
1/4 c apple cider vinegar
2 T molasses
2 T tamari
1 T stone ground mustard
1 T worsteshire
1 T paprika
1 t salt
1 t pepper


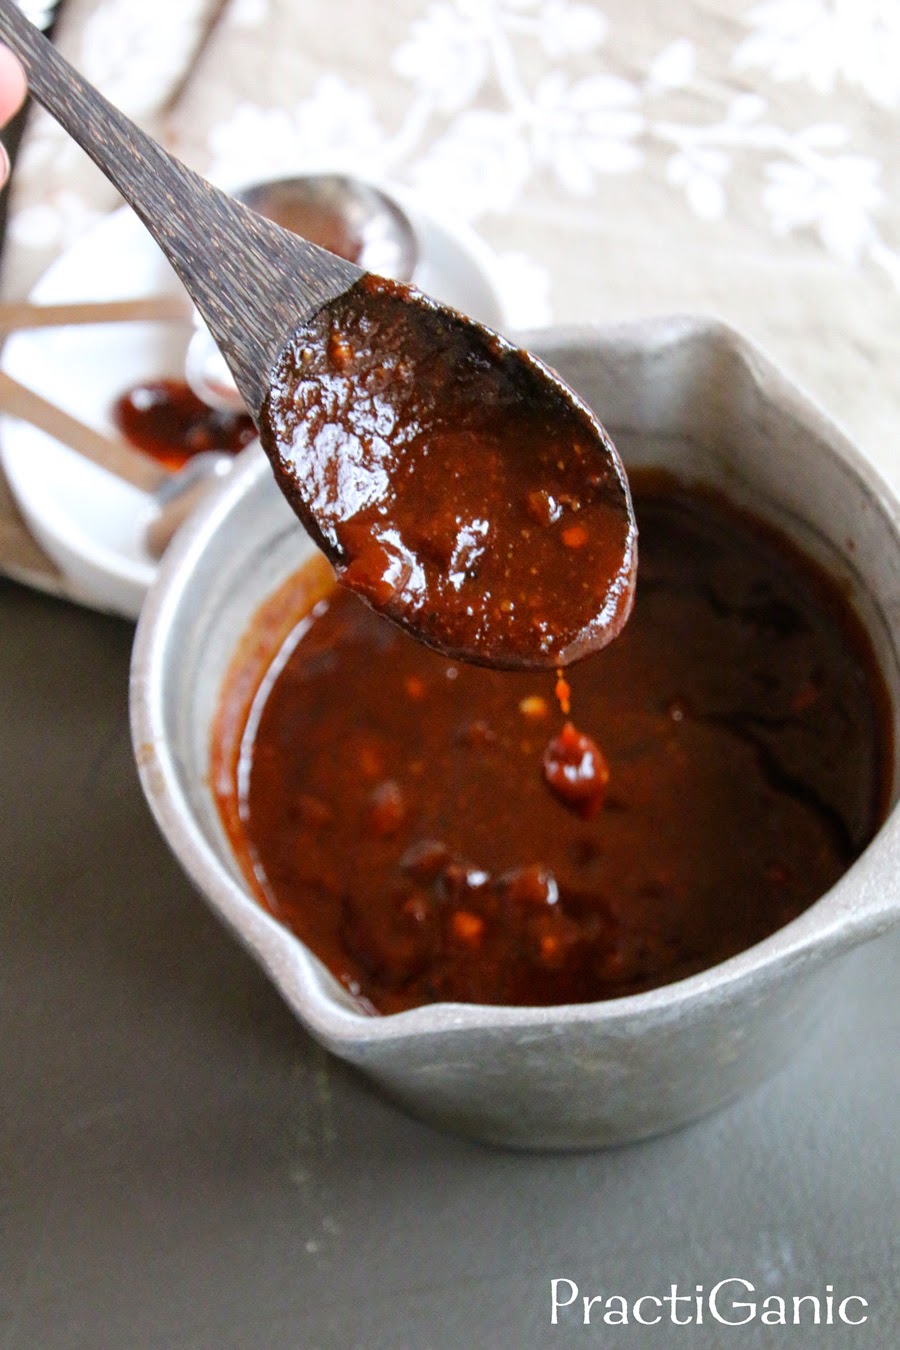
Saute onion and garlic in a little oil. Once onion is translucent, add in remaining ingredients. Bring to boil, then cover and simmer on low heat for 45-60 minutes or until it thickens.


Brandy Barbecue Sauce

I don't mind the chunks of the onion, but if you like a smooth sauce, use your immersion blender and mix it until smooth.

Top your favorite protein or veggies. I used tempeh ... yum!!

Brandy Barbecue Sauce