Thursday, August 28, 2014

How to Freeze Cucumbers - Cucumber Salad

My aunt has turned into my gardening and canning guru. I used to call my mom with questions and she gave me good answers but it usually ended with, "You should ask your Aunt Chris." I was able to get 17 quarts of pickles from my plants this year which I thought was really great. There were a few more stragglers here and there but not enough for me to get out the canning stuff and frankly, 17 quarts was enough pickles for me. I was telling my aunt this and she mentioned that I should freeze my cucumbers. What?! I just pictured a big soggy cucumber in a freezer bowl.

She continued to tell me that they come out nice and crispy. This truly intrigued me ... I had to try it out for myself! I took them out of the freezer few days later to try them and to my surprise, they were crispy! How could I doubt the Guru? I pulled another container out two weeks later ... still crispy!

This makes a nice cucumber salad that is ready to serve once you have it thawed. It's a little sweeter that I usually like my cucumber salads but it's still delicious and a great way to save cucumbers when you have an abundance!


How to Freeze Cucumbers

How to Freeze Cucumbers

Makes 2 quarts

Sliced Cucumbers (amount varies depending on your size of cucumbers)
1 medium onion, sliced
1 c sugar
1/2 c vinegar
1 T chopped dill


Layer cucumbers and onions with salt and refrigerate for 2 hours. Drain and rinse so they aren't too salty.

How to Freeze Cucumbers

Mix cucumbers and onions with sugar, vinegar and dill. Refrigerate again until the brine develops, about 3 hours.

Freeze in a tightly covered container making sure that the cucumbers are completely covered in the brine.

Wait at least a week before defrosting and eating and make sure you defrost them in the refrigerator.

How to Freeze Cucumbers

Spiked Fruit Bowl

Recently. we hosted a bachelor party at our house. The kids and I stayed far away! But before we left, I got to make food to keep the boys going throughout the day. They first went mountain biking so I wanted to send some food with them to the trails. After I go for a good bike ride, I always want fresh fruit so I figured that was a safe bet but I should kick it up a bit for a party so I soaked the fruit with a little booze! Don't worry, I also sent bread with them too ... beer bread and bananas foster bread! Might as well have a theme and have all the food filled with booze, right?

I was told the fruit went over really well, but there was a little left over. The next day, we threw the fruit in the blender with a little kale and that was the juice for the day!


Spiked Fruit Bowl

Spiked Fruit Bowl

12 cups fresh seasonal fruit of your choice ...
  • 1/4 large watermelon
  • 1 cantaloupe
  • 1 pint of blueberries
  • 1 pineapple
  • 2 clementines
2 T fresh herbs: Basil, Mint or Lemon Balm are always good choices
3/4 c rum or vodka


Wednesday, August 27, 2014

Coco-Nutty Orange Dreamcicle Juice

Green juices are the staple juice in the house. Recently, the kids haven't been drinking them as much. I think they are bored with the flavor ... frankly, I am too. We were in the habit of putting the same things in the juice: kale, carrots, apple, banana, hemp seeds and usually another fruit we had in the house. There is nothing wrong with this juice at all but I think we just need a little variety!


I took this unspoken challenge from the kids and I've been trying to do different fruits and veggies in their juices and get more kale into their meals. The other day, I went super far from the normal and did a juice with no vegetables and used milk and nuts. The results went over great! The kids tried drinking as much as they could but I found myself guzzling my new Coco-Nutty Dreamcicle Juice! The flavor took me back to childhood when I last had a dreamcicle. I had to wonder, do they still make dreamcicles? Truthfully, it doesn't matter because I found a better dreamcicle to enjoy.

Thanks for the challenge kids!


Coco-Nutty Dreamcicle Juice

Makes 3 cups

1 large orange, peeled
10 dates, pitted
1 c coconut milk (or other milk alternative)
1/2 c cashews or almonds
1/2 c unsweetened shredded coconut


Put all ingredients into your blender and mix until the dates and almonds have broken down. If you don't have a strong blender, first soak the nuts in coconut milk for an hour and chop your dates before blending. This will help everything breakdown easier.

Tuesday, August 26, 2014

Roasted Tomato, Black Bean and Corn Salsa

I have to thank my sister-in-law, Christine, for pushing me to make this recipe up. This is her first year gardening and canning and she is falling in love with the whole thing! She's calling asking about different methods and how to do things, which I always warn her that I am still learning a lot too but she has faith in me I guess. A month ago, she told me that she was going to need my salsa recipe. I actually laughed because not only did I not have one, but I never wanted one! I told her just use what she has in the garden and make it work ... that's the beauty of salsa. Last year, I canned about 10-15 quarts of salsa and marinara and every batch was different and I had no idea what the differences were. She didn't like that answer, she wanted a recipe!


Roasted Tomato, Black Bean and Corn Salsa: Easy to Can Recipe

After my heart was broken because our hail storm and my tomato plants and entire garden were destroyed ... yes, hail in August, check out the devastation! I was amazed that we were able to pick off a few tomatoes this past week. It will probably be the only salsa that I can make from my plants this season so it needed to be great. I was finally going to document what I was doing too.


So finally, 'Thank you, Christine!' This is my new staple salsa. Paul actually commented that it was the best salsa that he ever had (granted he is bias and my biggest fan, but it put a smile on my face). I now will be using a recipe for my salsa every time I make it. The roasted flavor really came through the tomatoes to give the salsa a very deep and robust flavor. Also, because I drained some of the leftover juices, it was really thick instead of soupy which many homemade salsas tend to be. The best thing about this salsa is I didn't have to peel and blanch all of the tomatoes. It was so easy! I won't be able to use my garden fresh vegetables for it, but I will be able to hit up the farmer's market to get my salsa for the winter and this year every jar will all be the same flavor!


Roasted Tomato, Black Bean and Corn Salsa

Makes 4 pints

10 large tomatoes, cored
1 large onion
2 green peppers
8 garlic cloves
1 jalapeno
1 c corn
1 15 oz can black beans, drained and rinsed
1/2 c scallions, diced
1/2 c cilantro, chopped
1/4 c apple cider vinegar
1 lime, juiced
1 T salt
1/2 T pepper


Preheat oven 400º.

Roughly chop tomatoes, onion and peppers. Place on two baking sheets with garlic. Bake for 30 minutes.


Roasted Salsa

Meanwhile, in a pan, fry the corn so that it gets the liquid removed. Keep moving them around with a spatula so they don't burn. Turn off heat and add black beans, scallions, cilantro, lime juice, vinegar, salt and pepper.

Drain the extra juice off of the pan and place vegetables in your food processor and pulse lightly ... Usually only for 10 seconds. A few good chunks are still nice! Add the hot vegetables to the corn and bean mixture.


Roasted Salsa

Roasted Salsa

Now you have a couple options. One, fill your clean and sterilized mason jars and put them in the fridge or freezer. If you made a big gigantic batch, which I am known to do in peak harvest season, I will fill freezer bags and freeze the salsa that way. Either way ... enjoy the salsa!

Roasted Salsa

Roasted Salsa

Monday, August 25, 2014

Vegan Wasabi Mayo

My favorite thing to use this dip for has always been Lemongrass Fries but it's soon topping the list for different burgers, chips and even raw vegetables. It works with just about everything!

Wasabi Mayo


1/4 c vegenaise
2 t prepared wasabi
1/2 t garlic powder
1/2 t toasted sesame seeds


Mix all ingredients together. Serve with fries or anything else 

that you want to dip in this great sauce!


Lemon Roasted Brussel Sprouts with Walnuts

Lemon Roasted Brussel Sprouts with WalnutsTwo years ago, I tried growing brussel sprouts in my garden. I didn't have much success, but I didn't really know what they should look like or how they grow so I'll cut myself a little slack. Last year, when I was working at the CSA farm, I was pleased to finally see brussel sprouts in their full glory on the stem.

They are beautiful, really tall stalks with little sprouts popping off the stem! It looks like a hundred little cabbage heads on every stalk! What's even better though then finally knowing what they look like in the garden is eating fresh seasonal brussel sprouts. I love roasting them, although steamed and smothered in butter is a close second! Many people like their brussel sprouts with bacon. I think this is because they can be a little dry and they need some fat and that's why I pair them with nuts and cheese. Then, I add a little lemon to brighten every bite! Happy summer!

I didn't think the kids would eat them, so I didn't even bother to put them on their plate. Of course, this made them extra curious and in need of them. Gabe ate almost everything on Paul's plate and then yelled out, "Mmmm mmmm, I love brussel sprouts!" Where was my tape recorder?!


Lemon Roasted Brussel Sprouts with Walnuts

Serves 4 sides

1 lb. brussel sprouts, halved
2 T olive oil
2 cloves garlic, minced
1/2 t salt
1/2 t pepper
2 T lemon juice
1/2 c toasted walnuts
1/4 parmesan cheese, optional


Cut the bottoms off of your brussel sprouts and half them. If some are really big, cut them in quarters so all of them are about the same size.


Lemon Roasted Brussel Sprouts with Walnuts

In a bowl, mix them with olive oil, garlic, salt and pepper. Bake at 375º for 20 minutes.

Roasted Brussel Sprouts with Walnuts

When they are still hot, mix them with the lemon juice, walnuts and parmesan cheese. Serve immediately ... they cool quickly.

Roasted Brussel Sprouts with Walnuts


Friday, August 22, 2014

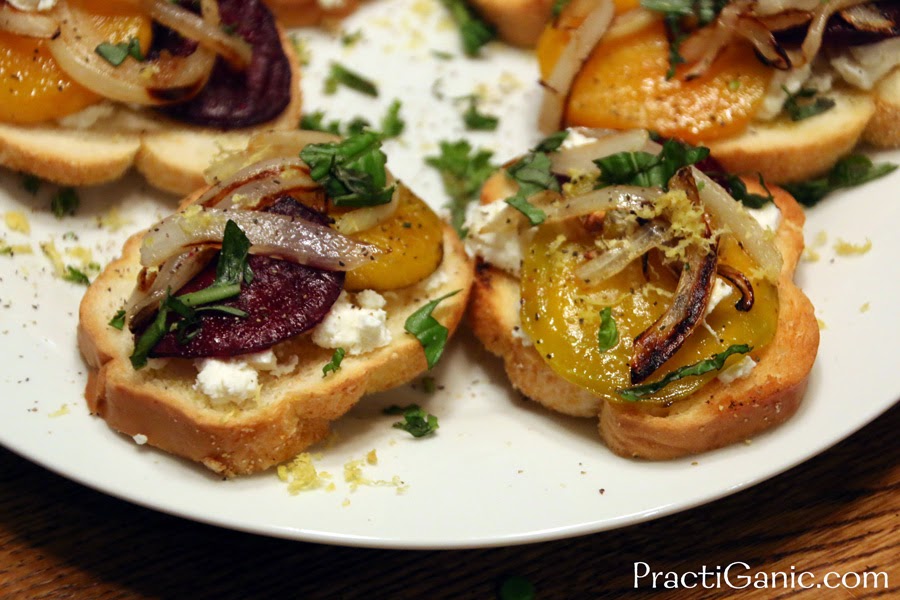
Beet and Goat Cheese Bruschetta

It was a sad day. We sold our 1978 VW Rabbit. We've been going back and forth about it for quite some time now, but with the family growing it made it very hard to keep the little car. By the time we got home from selling it and mourning our loss, it was time to get a bite to eat. Since it was a bit late, I didn't want to make a big meal, but I needed something ... and quick! I had two beets in the fridge so I started roasting them as I thought about what I would do with them.

It quickly came together as Beet and Goat Cheese Bruschetta. My favorite part of this whole appetizer was the lemon zest that I sprinkled on the top of it. It goes to show, don't skip over the little touches ... sometimes those are the ones that make the food sing!


The next day, I was still excited about this appetizer so I was telling my sister-in-law about it because she too is a goat cheese and caramelized onion fan. However, she just laughed at me because she thought this is the last thing that most people would make as a late night, last minute snack when they need food! What can I say though, I love the simple gourmet.


Beet and Goat Cheese Bruschetta

Makes 10

2 medium beets, peeled and sliced
10 slices baguette
Olive oil
Salt
Pepper
Garlic Powder

1 medium onion, julienned
4 oz goat cheese
1 T lemon zest
2 T basil, chopped


Preheat oven for 375º.

Lay slices of beet on a baking sheet. Spray with oil and sprinkle with salt and pepper. Bake for 15 minutes. They should be slightly firm but golden.

Next, lay slices of bread on a baking sheet. Spray with oil and sprinkle a little salt and garlic powder on them. Bake for 7 minutes. or until they are the crispiness that you like.

While your toast and beets are in the oven, caramelize your onions over a medium heat with enough oil to keep them moist ... about 1 T.

To assemble, spread goat cheese on bread, top with two slices of beet then a little caramelized onion. Garnish with lemon zest and basil. I am very generous with the lemon zest. The extra flavor is amazing!


Thursday, August 21, 2014

Vegetarian French Onion Soup

Vegetarian French Onion SoupOne thing that I wish there was more of in this world is Vegetarian French Onion Soup! When it's rainy outside or a little bit cold, there's nothing better than a warm cup of soup (and listening to Van Morisson while you're eating it!).

When I'm at at restaurant and see French Onion Soup on the menu a little tear always runs down my face as I know it is made with beef broth. Why is this? Can't it just be a vegetarian soup? After the past few years of making it homemade and using vegetable stock, I truly don't think it's missing anything. I think it's actually better! Of course, this is one girls opinion, but you be the judge of that!


Vegetarian French Onion Soup

Serves 2

1 T butter
2 c julienned yellow onions
1 T white wine
1/2 c vegetable stock (gluten free if you need, many store bought ones are not)
1/4 t pepper
1/4 t worsteshire sauce

2/3 c swiss cheese (I like ussing fontina too)
2 slices french bread or gluten free bread


Sauté onions in butter until nicely caramelized. Cook them over a medium heat for 15-20 minutes. Deglaze your pan with white wine. and mix in your vegetable stock, pepper and worsteshire sauce. Simmer for 20 minutes.


Vegetarian French Onion Soup

Meanwhile, toast your french bread so that it is good and crispy.

Heat the oven on broiler.

Ladle the soup, dividing it into two ramekins or other oven safe dishes.

Vegetarian French Onion Soup

Top with the bread and then your cheese.

Vegetarian French Onion Soup

Place ramekins on a baking sheet and put in the oven and broil until your cheese is brown and starts to bubble ... watch it, it will turn fast!

Vegetarian French Onion Soup


Peanut Butter Cups - The Real Deal

Homemade Peanut Butter CupsPaul used to have a small peanut butter cup addiction. After going to classes and coming to terms with his issues, he hardly touches them anymore! Every now and again I feel like I should make some from scratch so he doesn't fall off the wagon and start cleaning out vending machine again! Okay Paul, so this is slightly over exaggerating, but as you know, that's just what I do.

Part of the reason Paul has stayed away from store bought peanut butter cups is because the chocolate industry is actually quite scary. Most of the world's chocolate is intertwined with young children as well as adults working in extremely hazardous conditions. When buying chocolate, please think about it and try to buy fair trade chocolate. Read, 'The Chocolate Industry Exposed: Child Labor, Trafficking and Fair Trade Mislabeling', a great article for more information.

As you know, I always try to make a healthy alternative to the normal sweet treats but this is where my 'practical' part of PractiGanic comes in ... sometimes you just need the real thing. Peanut butter cups are one of those recipes that sometimes I don't want to make the healthy version, but of course, making them homemade is always better and healthier than store bought so I have that going for me! Also, to try to be a bit healthier, I like to use dark chocolate instead of milk chocolate.

However, if you are looking for a healthier snack, try my Raw Almond Joys for now but stay tuned, I think I'm going to be making a raw peanut butter cup in the near future!


Peanut Butter Cups

Makes 48 minis or 24 regular

2 bags chocolate, dark, milk or vegan works so pick your preference
3/4 c peanut butter
1/2 c powdered sugar
1/4 c rice crispies


Forget the double boiler and melt your chocolate in a crock pot. It can sit in there for a while on low and never burn! Genius!!

Homemade Peanut Butter Cups

As you are waiting for the chocolate to melt, mix together the peanut butter, powdered sugar and rice crispies.

Next, line a muffin tin with paper liners. Pour a little chocolate in each one. Taking a toothpick or a paintbrush, spread the chocolate all around the liner. Put the chocolate in the freezer for 2 minutes so it quickly hardens.

Homemade Peanut Butter Cups

Take the cups out of the freezer and divide your peanut butter mixture in the cups. and flatten it with your finger or spoon but make sure that it doesn't spread all the wait to the liner. You want chocolate to be able to go all around the peanut butter filling.

Homemade Peanut Butter Cups

Next, pour chocolate over the peanut butter so that it completely covers the peanut butter filling.

Homemade Peanut Butter Cups

Put in the refrigerator so they set. I always keep mine stored in the fridge too so they don't melt.

Homemade Peanut Butter Cups


Tuesday, August 19, 2014

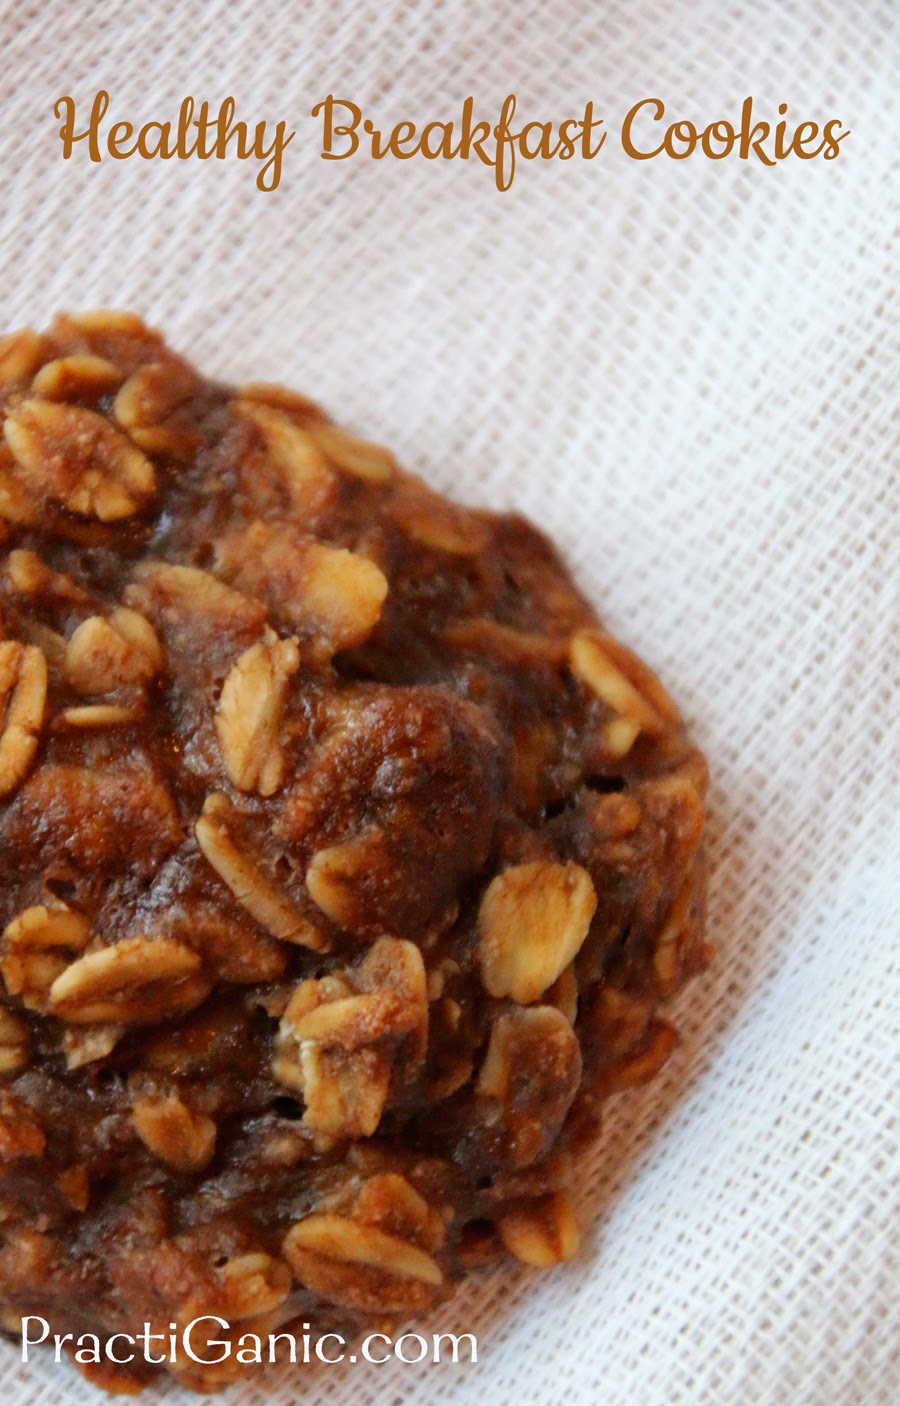
Healthy Breakfast Cookies

Banana Oat CookiesWe have had a crazy couple weekends. I feel like I've been feeding the kids out of a cooler for days now! Most of the time they do pretty well, but when I know we're going to have really busy days I know they are not going to want to eat what I want them to eat.

One morning last week we had to run out the door right after breakfast and I had to prepare that they were going to give me a hard time about it. I decided I should make them a 'cookie' with their breakfast so that they would be excited about it! I didn't have much time so I was literally piecing a few things together out of the fridge and pantry while saying a little prayer that they turned out.

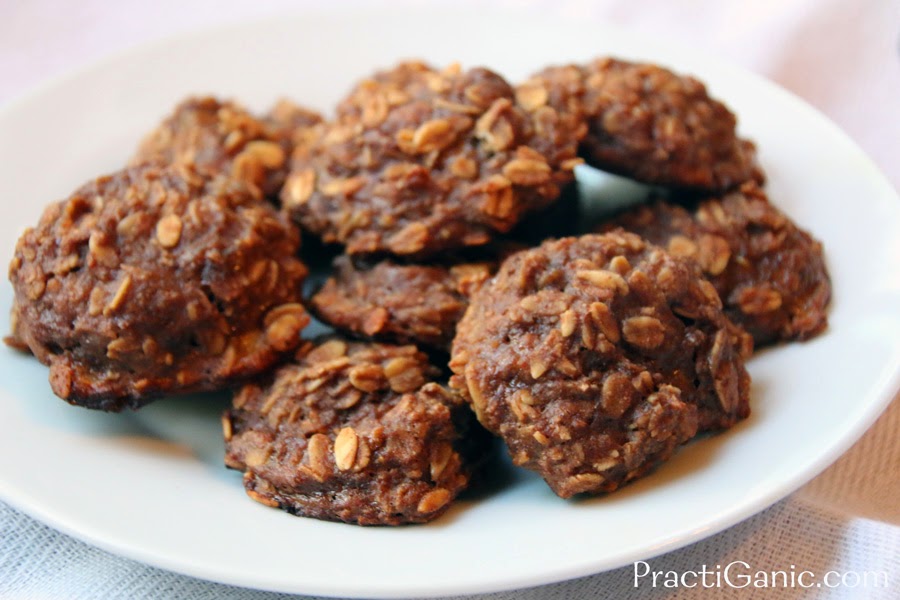
Luckily, they did and the kids ate up! The one bad thing is they took a little longer in the oven than I anticipated, but we had the time so it all worked out (they ate them in the car). They thought it was the most amazing thing that they got cookies for breakfast. It was a supermom moment.


Banana Oat Cookies

Makes 10-12

1 Banana, smashed
3/4 c old fashioned oats
1/4 c applesauce
2 T almond milk
2 T peanut butter or other nut butter
2 t cocoa
1/2 t vanilla
1/2 t cinnamon


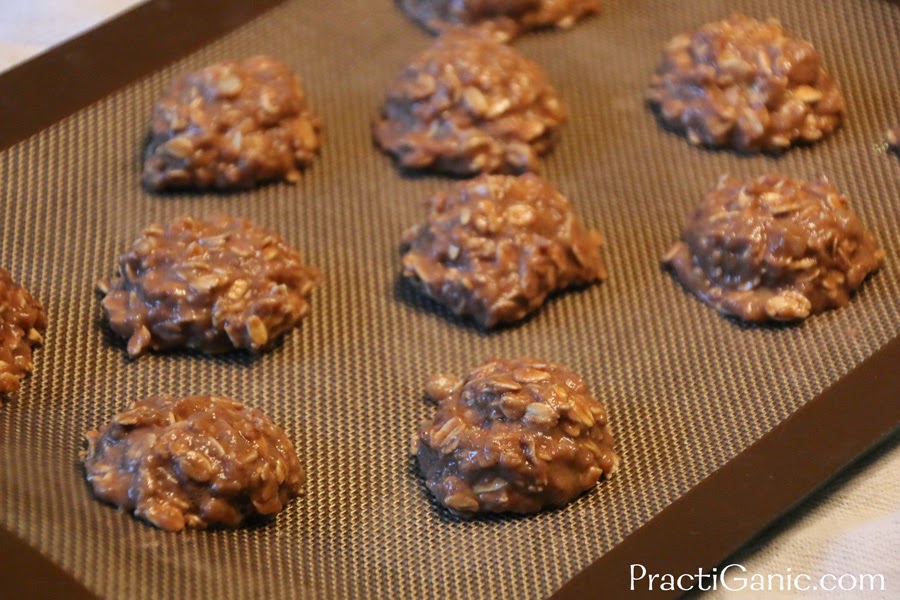
Mix all ingredients in a bowl. Drop 1 1/2 T balls of the mixture on an ungreased baking sheet (I like using parchment paper too).

Healthy Breakfast Cookies

Bake at 350º for 35-40 minutes. You will think you are going to burn them but they take a long time to cook! Keep an eye on them so the bottoms don't burn. They will firm up a little more after you take them out.

Banana Oat Cookies

Monday, August 18, 2014

Veggie Enchilada Bake

Enchilada BakeMexican is just a craving for me. I don't know if it's because I love a little spicy food from time to time or if it's the fun drinks that I have to make to go with the meal. Okay, I think I just answered my own question! At least once a week it's Mexican night. I like making a big meal on these nights because Mexican makes such great leftovers.

Paul's brothers help us out all the time with random projects and work around the house. I always feel like there is no way that we can pay them back, but luckily they work for food. Recently, I made a big enchilada bake for them when they came for dinner. There were just four adults so I was excited that I would have my lunch set for the next day. 
I was feeling quite ambitious so I even made them some fresh enchilada sauce. To my surprise, the whole thing was gone! I couldn't believe it! I really liked how the bake turned out but my brother-in-laws loved it!

Even though I didn't get any the next day, I was so happy that it went over well. The toppings are the big highlight for me in this bake. The cilantro, scallions, pepitas and fresh tomatoes really brighten up every bite so don't skip over those!


Veggie Enchilada Bake

1 1/2 lb potatoes, sliced
1/4 t salt
1/4 t pepper
1/4 t chili powder

1 T olive oil
2 garlic cloves, minced
1 c onion, diced
16 oz mushrooms, sliced
1 medium zucchini, cut in half moons
15 oz can pinto beans, drained and rinsed
1/2 t salt
1/2 t pepper
2 T lime juice
2 T pepitas (sunflower seeds work too)

12 oz queso fresco, crumbled (to make vegan, use a vegan crumbled cheese or cashew cheese)
3 c enchilada sauce (recipe below)
12 6 inch corn tortillas


Toppings:
2 T cilantro
2 T scallions, chopped
3/4 c cherry tomatoes


Preheat oven to 400º.

Mix potatoes with first listing of salt, pepper and chili powder. Bake for 20 minutes. Set aside.

Meanwhile, sauté garlic and onion for 3-4 minutes. Add mushrooms and cook down until liquid has almost evaporated. Add zucchini, pinto beans, salt and pepper and cook for another 3-4 minutes. Turn off heat. Mix in lime juice and potatoes.

Time to assemble! Spray your 13x9x2 pan, first layer 1 c sauce, 6 tortillas, half of the veggies then 6 oz of cheese. Repeat ... Sauce, tortillas, veggies, sauce then cheese. Top with pepitas.

Bake at 375º for 30 minutes. Top with cilantro, scallions and cherry tomatoes. Bake for 5 more minutes. Let sit for 5-10 minutes before cutting.

Homemade Enchilada Sauce

Makes 3 cups

1 T olive oil
1 c onion, diced
1 c green pepper, diced
3 garlic cloves, minced
1 T jalapeno (change this up depending on the heat of the jalapeno and your liking)
1 T coriander
1 T cumin
2 t oregano
1 t salt
1 t pepper
2 T tomato paste
28 oz can whole peeled tomatoes

Sauté onion, green pepper, garlic and jalapeno in olive oil for about 5 minutes or until onions are translucent. Add in spices and tomato paste. Mix well. Lastly, add in your tomatoes, juices and all. Bring to boil then cover and turn down heat to low. Simmer until you are ready to use. The tomatoes will begin to breakdown and use your spoon to help them out.

Easy Enchilada Sauce

I always say, the best things in life are homemade. Sauces are the perfect example. If you want to make a meal taste over-the-top-delicious, the sauce needs to come from the heart! It's the part of the meal that is drenched over every bite and highlights the rest of the ingredients. Next time, take that extra step and make your own sauce ... you won't regret it!

Homemade Enchilada Sauce

Makes 3 cups

1 T olive oil
1 c onion, diced
1 c green pepper, diced
3 garlic cloves, minced
1 T jalapeno (change this up depending on the heat of the jalapeno and your liking)
1 T coriander
1 T cumin
2 t oregano
1 t salt
1 t pepper
2 T tomato paste

28 oz can whole peeled tomatoes

Sauté onion, green pepper, garlic and jalapeno in olive oil for about 5 minutes or until onions are translucent. Add in spices and tomato paste. Mix well. Lastly, add in your tomatoes, juices and all. Bring to boil then cover and turn down heat to low. Simmer until you are ready to use. The tomatoes will begin to breakdown and use your spoon to help them out.

Friday, August 15, 2014

Good Morning Beet Juice

As a kid, probably like most kids, I was not a fan of beets. Strangely, It wasn't until I started making baby food that I started liking them. People always talk about how gross baby food tastes and I just don't understand why they would expect their babies to eat it then! I think that their food should taste just as good as mine so I would always taste the food before feeding them, making sure it was edible. One combination that always went over great was beets and apples.

Recently, I posted about my favorite 15 Easy Peasy Baby Food Purees. Writing about the beets and apples got my tastes buds wanting a bite ... great timing, because I have quite a few beets from my Aunts garden! We hadn't had our daily juice so I figured we would have a beet and apple juice instead of making beets for dinner.


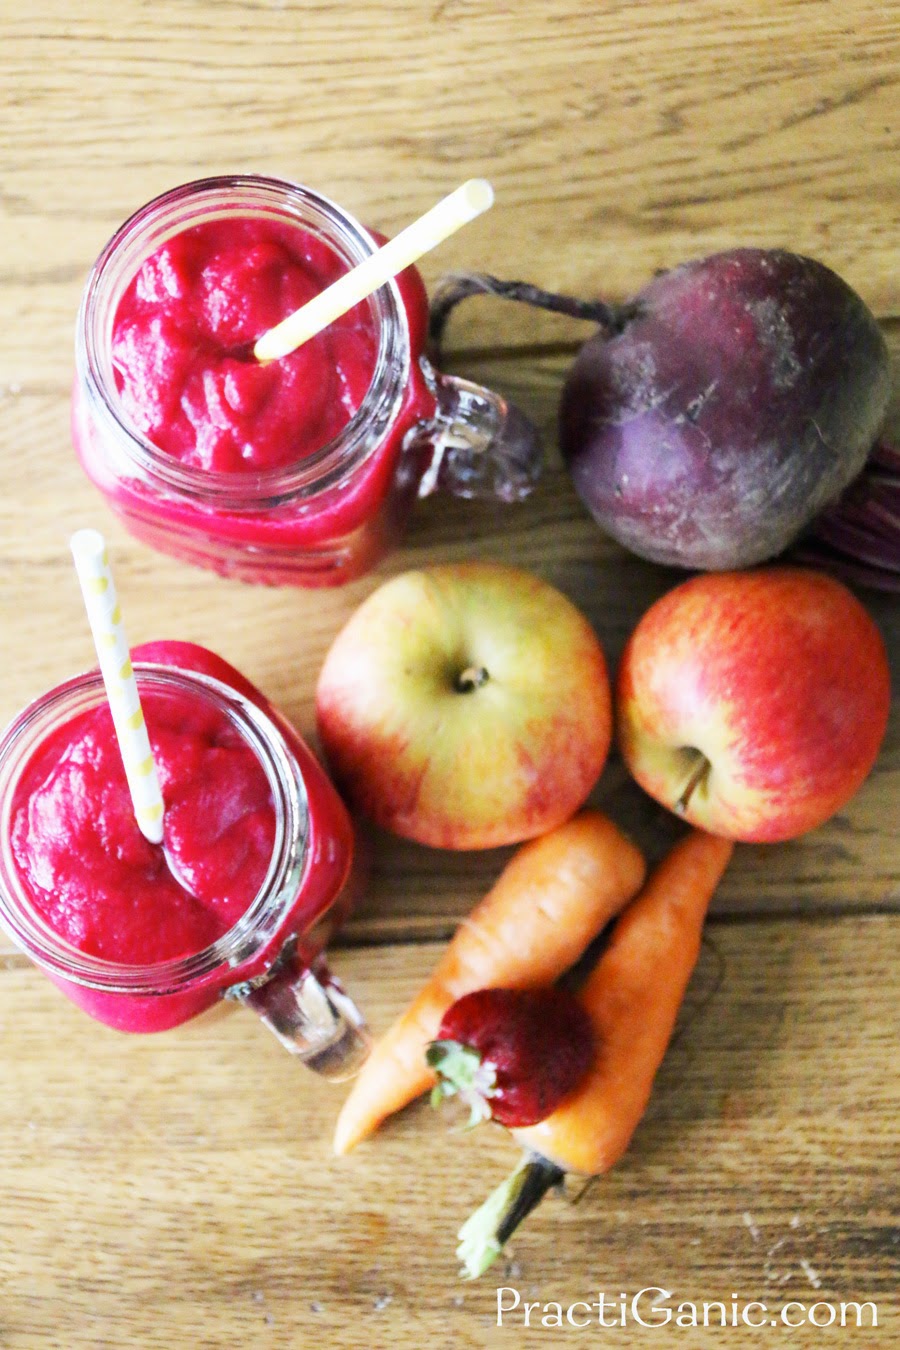
Beet, Apple and Carrot Juice

I was trying to take a picture of the juice and the kids kept trying to steal the juice off the table. I was a little leery of them actually liking the juice because they are not huge beet fans anymore but they both downed it! This juice was equal parts fruit and veggies so it wasn't overly sweet but the apples pair so well with the flavor of the earthy beet that they loved it!

This may be the brightest juice that I have ever made ... Not only does the hot pink really get your moving in the morning but all the great vitamins and minerals from the beets, apples, carrots and strawberries really put a skip in your step!! Regardless of your love of beets, give this juice a try ... you may surprise yourself!


Beet, Apple and Carrot Juice

Good Morning Beet Juice

Serves 2

1 large beet, peeled and cut
2 small apples, I used gala apples
1 medium carrot
1 cup strawberries
1/2-1 c of water or ice for consistency


Put all ingredients in the blender. Enjoy!

Beet, Apple and Carrot Juice