Monday, September 29, 2014

Spicy Carrot Dip

This is a dip I have been making for years now. I use it as a dip and spread. It's great with crackers, other veggies or even your favorite wraps. I started spreading it on a tortillas with a little chopped spinach for a little carrot quesadilla for the kids! The options with this dip are seriously endless!

Spicy Carrot Dip

Makes 1 1/2 cups

1 lb carrots
3 T coconut oil
2 T rice wine vinegar
1/2 t ginger
2 clove garlic
1 1/2 t red curry paste
1/4 t salt
1/4 t pepper


Cut up carrots into 1 inch pieces. Cook them in boiling water until they are soft and tender. Once done, puree all ingredients in a food processor until smooth. Add more oil or salt as needed.

Smoked Tempeh & Spicy Carrot Wraps


Smoked Tempeh & Spicy Carrots Wraps

I've had an overload of carrots lately. I don't really know how, we seem to go through them a lot but there's still a ton in the veggie drawer. I decided to make a batch of my spicy carrot spread to use a few of them up. It's not too spicy so there was a chance that the kids might have a few bites too. I was having a daydreaming type of day because as I was cooking the carrots, I realized that it was almost time to start getting dinner together. I could tell by the amount of whining I started to hear. Problem was, I had no dinner plan. The whining continued to increase and fast!
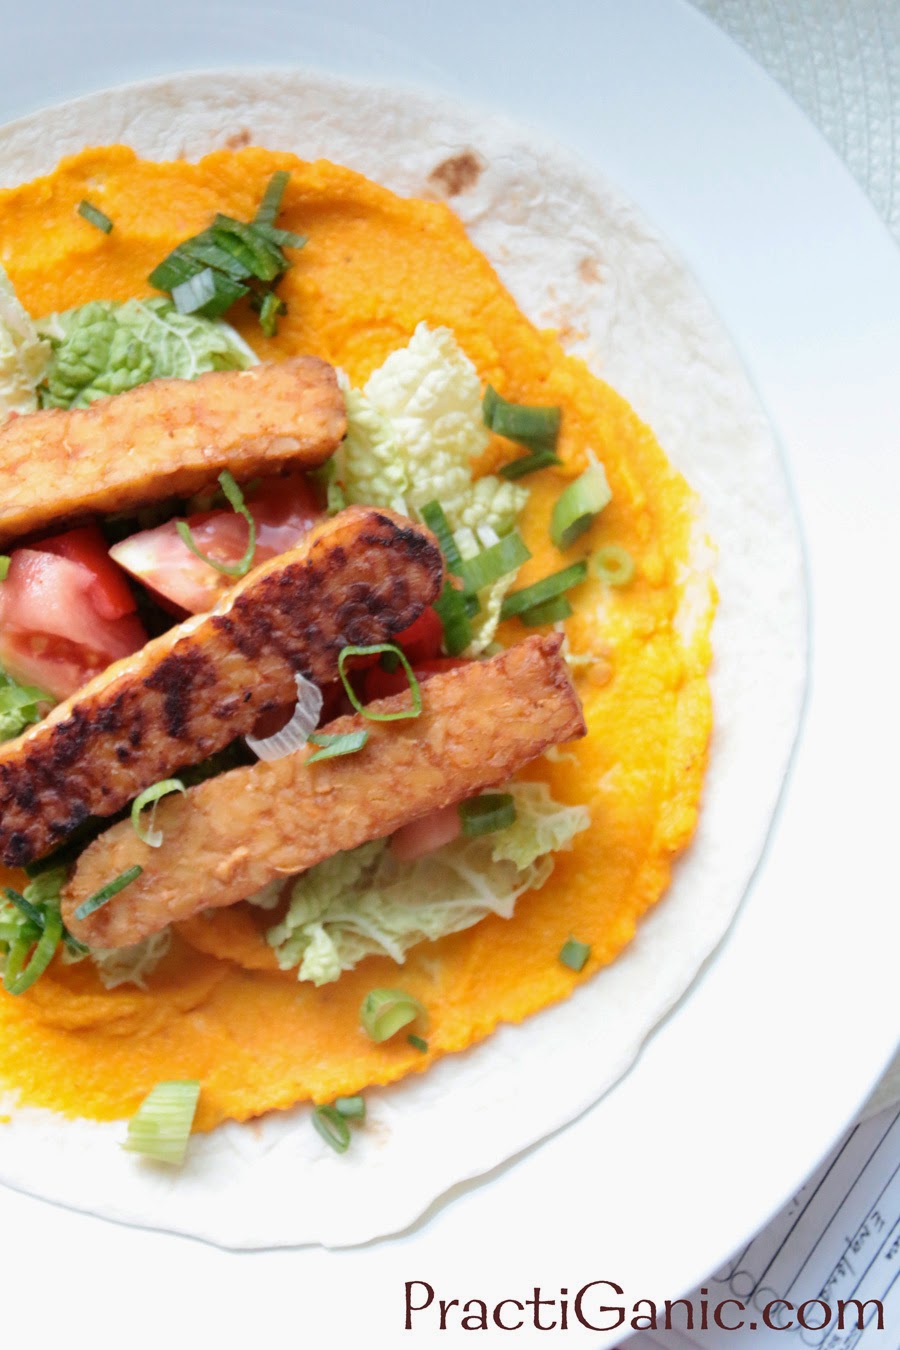

Smoked Tempeh & Spicy Carrot Wraps

I started to get veggies and beans and a few thing together for the kids. I decided to spread a little carrot spread on a tortilla for them. They loved it. Now that the kids were fed and happy, another realization hit ... I didn't have dinner ready for Paul and I! Ugh! Since the kids liked the carrot spread on the tortilla, I decided I could make wraps for us too. I quickly put a marinade together for some tempeh and away I went.

Smoky, sweet, spicy ... there is so much flavor going on in these wraps. They were delicious and most importantly for me that night, quick and easy.

I always make a double batch of the spicy carrot spread. After having it, you're going to want to use it as a dip or spread it on everything!
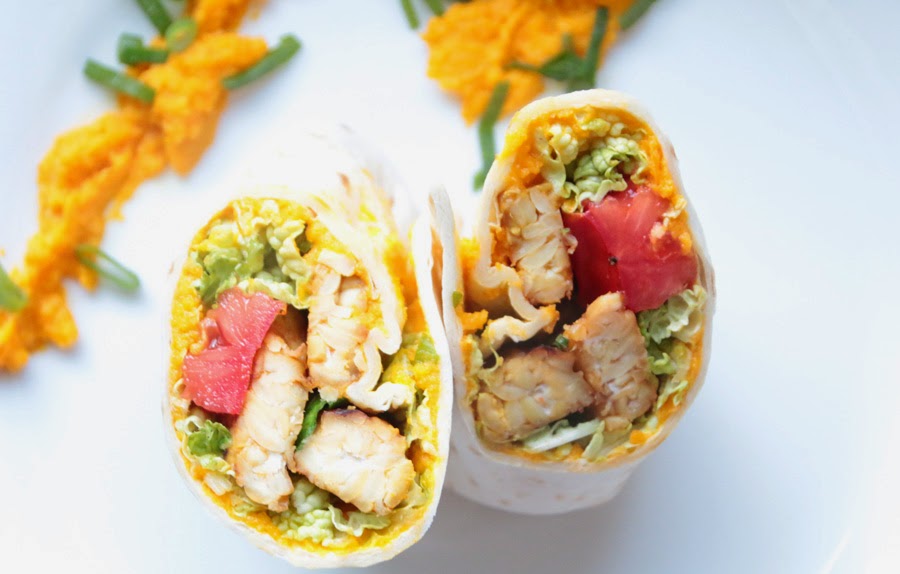

Smoked Tempeh & Spicy Carrot Wraps

Smoked Tempeh & Spicy Carrots Wraps

Makes 2-3

8 oz rempeh
2 T pure maple syrup
2 T tamari, bragg's liquid amino's, coconut amino's or soy sauce

1 T liquid smoke
1/2 t garlic powder

1/4 t onion powder
1/4 t smoked paprika

1/4 t salt
1/4 t pepper

spicy carrot spread (recipe below)
cabbage
tomato
green onion
2 10 inch tortillas


Slice tempeh usually about 1/2 inch thick. Mix the syrup, tamari, coconut oil, garlic powder, paprika, and liquid smoke. Marinade the tempeh in the mixture for at least two hours (I didn't marinade this long the first time I made it and it definitely needed more time).

Preheat oven for 375º. Take tempeh out of marinade and lay tempeh slices on a sheet tray, save your marinade. Bake them for 12-15 minutes on each side. Once done, mix them back in the marinade.

On your floured tortilla, spread the spicy carrot spread.  Top with cabbage, tomatoes, tempeh and green onions. Wrap up and eat!

Spicy Carrot Spread

1/2 lb carrots
1 1/2 T coconut oil
1 T rice wine vinegar
1/4 t ginger
1 clove garlic
3/4 t red curry paste
1/8 t salt
1/8 t pepper


Cut up carrots into 1 inch pieces. Cook them in boiling water until they are soft and tender. Once done, puree all ingredients in a food processor until smooth. Add more oil or salt as needed.

Smoked Tempeh & Spicy Carrots Wraps

Friday, September 26, 2014

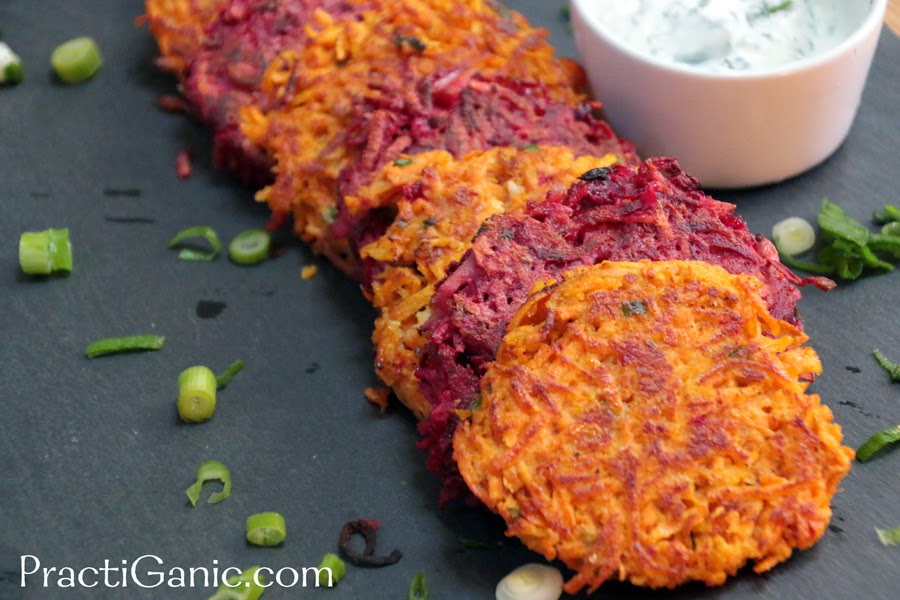
Root Vegetable Potato Pancakes with Yogurt Dip

Root Vegetable Potato Pancakes with Yogurt Dip
I love potato pancakes. They are easy and quick to make which is perfect when I need a side dish and am coming up short on time and ingredients. The other night, the kids were begging me for french fries at dinner. Usually this isn't a problem, but they just had potatoes for lunch so I wanted them to have a different vegetable or more vegetables at least. We were having soup for dinner, which I knew that they wouldn't eat a lot of so I decided I would make potato pancakes as a side and probably most of their meal!

Of course, once I started I got really into it. My excess of beets and carrots were calling me from the fridge so I ended up making not one, but two versions of potato pancakes. Amazingly enough, making both types didn't take that long since I just shredded one veggie after another. The ingredients I used for both pancakes were pretty similar, but there was a little highlight flavor in each of them to make them taste totally different.

Not only did the kids eat them up, but they didn't even mention french fries! I told them they had purple potatoes and orange potatoes. They were thrilled!

If you like these, you'll love my Veggie Potato Pancakes too!


Root Vegetable Potato Pancakes


Carrot & Sweet Potato Pancakes
Makes 4

1 c sweet potato, shredded
1 1/2 c carrot, shredded
1 egg
2 T scallions, chopped
2 T garbanzo bean flour (or AP flour)
2 T feta cheese
1 garlic clove, minced
1 t lemon juice
1/2 t mint
1/2 t salt
1/4 t pepper

coconut oil for frying


Mix all ingredients into a bowl. Heat oil in a pan. Using a 1/2 c scoop, divide your pancake mix into four pancakes. Fry on each side about 4-5 minutes each of until golden brown.

Beet & Potato Pancakes
Makes 4

1 c potato, shredded and squeezed
1 1/2 c beets, shredded
1 egg
2 T Scallions
2 T garbanzo bean flour (or AP flour)
2 T parmesan cheese
1 garlic clove, minced
2 t horseradish
1/2 t salt
1/4 t pepper


coconut oil for frying

Mix all ingredients into a bowl. Heat oil in a pan. Using a 1/2 c scoop, divide your pancake mix into four pancakes. The batter is extra runny so make sure you squeeze out the extra liquid before putting them in the pan. Fry on each side about 4-5 minutes each of until golden brown.

Yogurt Dip
1/2 c plain greek yogurt
2 T lemon juice
2 T parsley
2 garlic clove, minced


Mix all ingredients in a bowl.

Root Vegetable Potato Pancakes with Yogurt Dip

Root Vegetable Potato Pancakes with Yogurt Dip


Wednesday, September 24, 2014

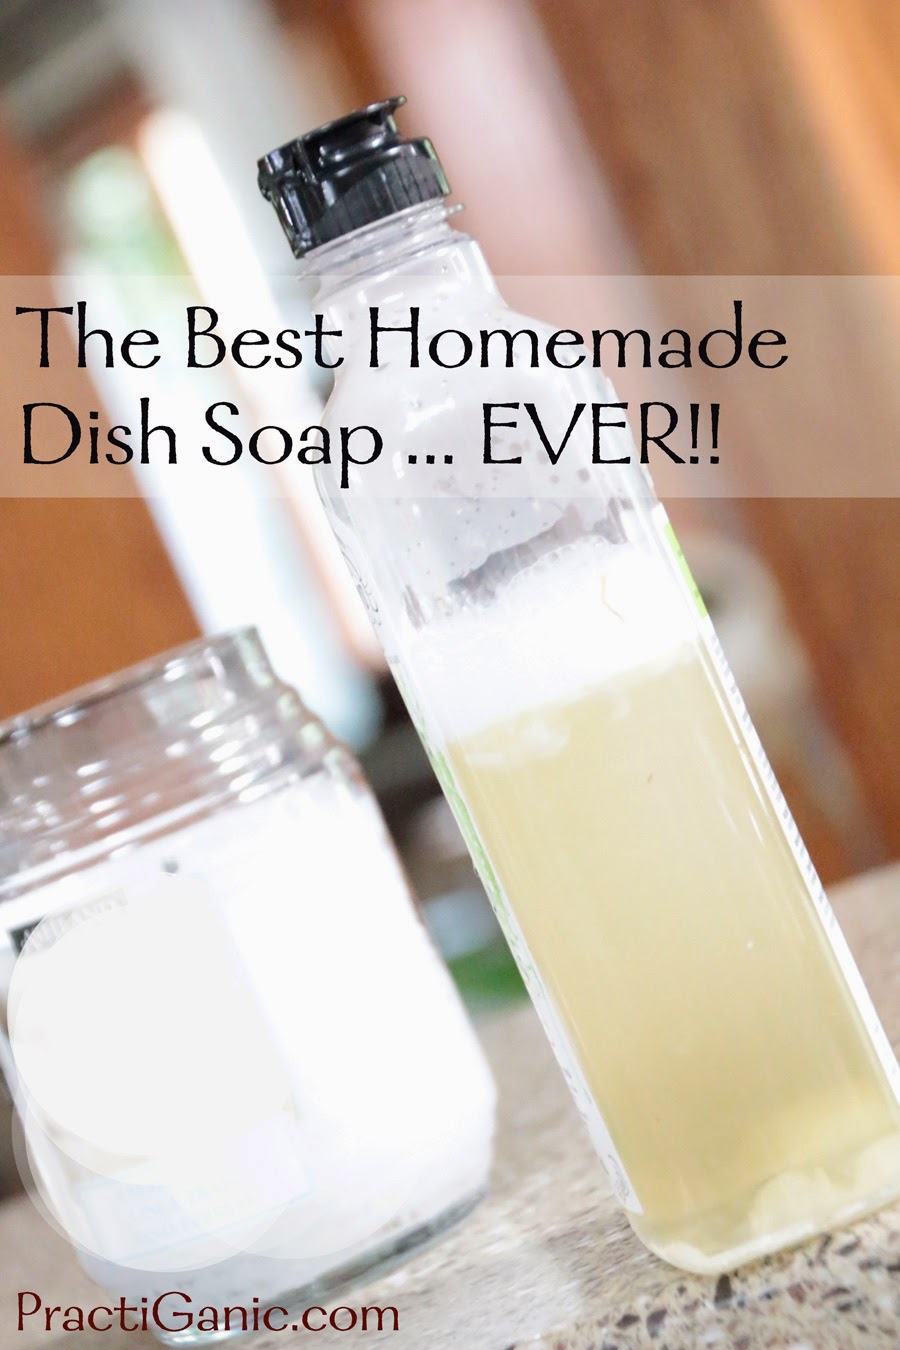
Best Homemade Dish Soap EVER!

I have been making my own dish soap for a few months now. I have noticed that I go through it really fast so I have been making it way too often. It was basically the consistency of liquid castile soap so it would come out really fast and I would end up using twice as much. It made me think twice. Is this really beneficial to make it myself or not?

I decided before I gave up completely, I would do a little research and go back to the drawing board. I found an article on Mommypotamus. She tested lots of different soaps and found one that works. It uses washing soda which I have never used before, but that is the mystery thickening agent. I was super excited to try it. The glycerin is there to keep it from separating. The first few times I made the new recipe, I was amazed at how it thickened ... actually, it got a little too thick so I had to keep adjusting the amounts to work for me. If you look at the first picture I have, it shows the soap being more liquid and the picture below it shows it getting a thick white consistency. It's really amazing!

Don't forget to check out more of my natural cleaner recipes!


Best Homemade Dish Soap

Makes 2 cups

1 3/4 cups water
1/4 cup grated castile bar soap, tightly packed
1/4 cup + 2 T liquid castile soap
2 t super washing soda
1 t vegetable glycerin
30-40 drops essential oil (I use 20 lemon to help cut the grease, 10 lavender and 10 tea tree)


Mix water and grated bar soap in a pot. Bring it to boil and mix it until the bar soap has completely mixed in.

Meanwhile, add your liquid castile soap, washing soda, vegetable glycerin and essential oils to your container. Once your water and bar soap has completely mixed, add it to the remaining ingredients. Mix well.

Here's the important part ... wait! In about 24 hours, the soap will thicken up and it will be ready to use. I will occasionally shake it up to keep everything mixing well. If it gets too thick add a little more water and if it's too thin, add more washing soda (1/2 t at a time).


Monday, September 22, 2014

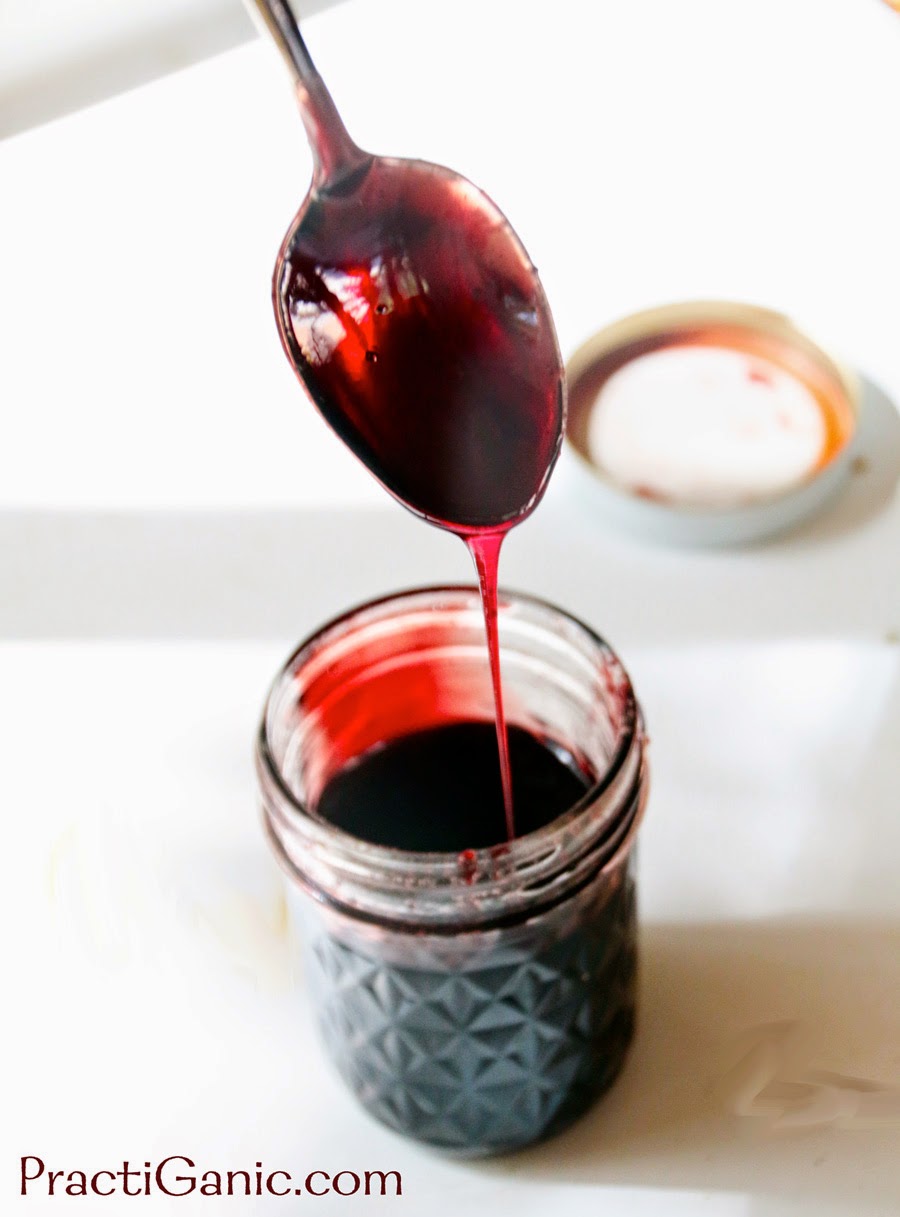
Spiced Wine Jelly

I know, I know ... who has leftover wine sitting around? Well, I did. I needed to open a bottle of wine for a dessert I was making, but it was about 10 in the morning ... not time to have wine, for me anyways!  So, the rest of the bottle just sat there all day and by the time dinner rolled around, I completely forgot that I had opened it. I'm not a huge fan of leftover wine. Even when stored properly, I just can't seem to enjoy it. It always seems to have a sour taste to it.

I didn't want to make another dessert and use only half a cup and I didn't want to toss the bottle away. I figured I should make a sauce with it to go over mushrooms or something like that. Trouble was, that just didn't sound great to me at the time. I don't know about you, but if something doesn't sound appetizing at that time, I just don't feel like cooking it! I remembered this beer jelly I recently came across that caught my eye. If you can make jelly with beer ... you can make jelly with wine!


Spiced Wine Jelly

As I poured the wine into a pot and added some sugar, Paul was talking about how great the weather had been and the beauty of the trees turning. We got excited about fall being on the way. As I smelled the wine cooking, it made me think of glogg which is a Scandinavian mulled wine that is served warm. It's delicious on a fall day. Quickly, I went for the spice cabinet to see what I could add to the jelly to give it that glogg taste. It completely made the jelly what it is! Thank you Paul for steering me in the right direction ... as always!

I have had this at a few parties now, and it is an instant crowd favorite! I serve it with water crackers and parmesan or asiago cheese. This would make a great hostess present too. I think I'm going to be making a large batch of it to bring to people that we visit over the holiday season. It's never too early to get ready for Christmas.


Spiced Wine Jelly

Makes 1 1/2 cups

2 c red wine, I use cabernet sauvignon
1 1/2 c sugar
1 stick cinnamon
1/2 t ground cloves
1 T pectin


Start by bringing your wine and sugar to boil. Once boiling, reduce the heat to keep it to a slow rolling boil. Then, add the cinnamon stick, cloves and pectin. Keep it at a boil until it reduces by half and becomes thicker.


Spiced Wine Jelly

The jelly will still be quite thin when it is done but it will thicken up more as it cools down so don't worry that it is still soupy. Put it into a container and keep refrigerated.


Spiced Wine Jelly

If I am going to make a couple batches to save, I will ladle the jelly into 8 oz sterilized jelly jars immediately, leaving 1/4 in headspace. Make sure the rim and center lid are wiped down and screw the band on tight. The heat from the boiling jelly seals the jar and keep them in the refrigerator,

To ensure sealing, us a hot water bath and process the jars in a boiling water canner for 10 minutes.

Spiced Wine Jelly

Spiced Wine Jelly

Friday, September 19, 2014

Sage Pesto

Sage is an herb that I love but I don't have many uses for until Thanksgiving rolls around. Besides making sage smudge stick ... how much sage can one really consume? This year, my sage is absolutely crazy! I planted regular sage this year, usually I do purple or golden sage and the plants grow well but not as huge as this year. I don't know if it was the weather conditions or if it's just this type of sage that loves my garden. Regardless, I'm not complaining.

I was staring it down as I was picking my basil for pesto last week when it dawned on me to try a sage pesto. It is fall and with squash and sweet potatoes making it through the kitchen right now, I figured it was worth a try. Did it work? Let's just say in the past 5 days I have made it 3 times! It's my new fall favorite!


Sage Pesto

I've used it on Sweet Potato Stuffed Shells, Squash and Walnut Bruschetta and I can't wait to try it drizzled on my sister-in-laws squash soup that she makes for Thanksgiving. Savina won't stop eating it with a spoon ... 20 months and I have sage pesto addict on my hands. Now I'm looking at my massive sage plant wishing it were bigger because I just have enough to get me though the season and I won't be able to save it and freeze it for the winter!


Sage Pesto

Sage Pesto

Makes 2/3 cup

1 c sage, tightly packed
1/3 c grapeseed oil (olive oil will work just fine)
1/4 c toasted walnuts
1/4 c parmesan cheese*
1 garlic clove
1/2 t lemon juice
1/4 t salt


*to make vegan use 1/3 c roasted cashews in place of walnuts and parmesan cheese.

Put all ingredients into your food processor and mix until smooth. Add more oil if needed.
Sage Pesto

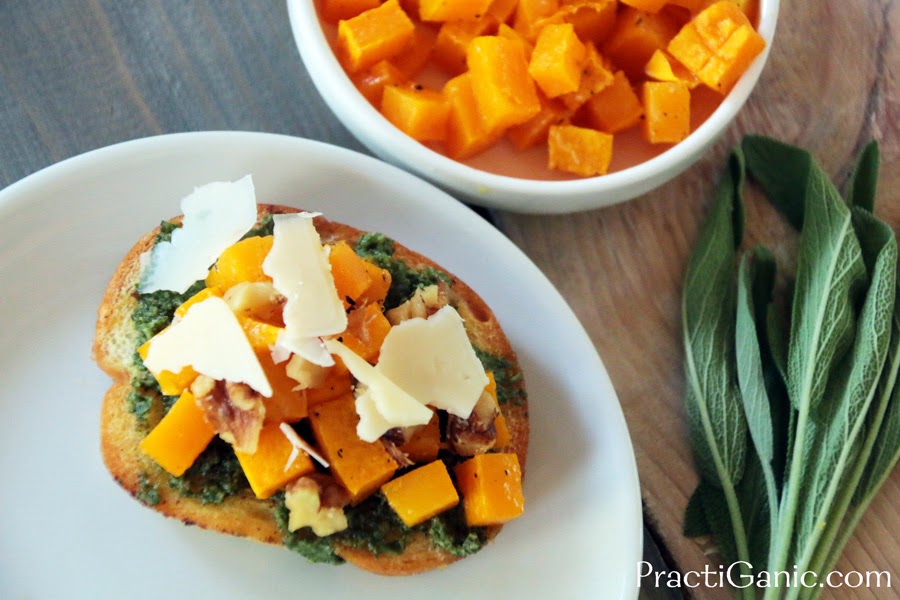
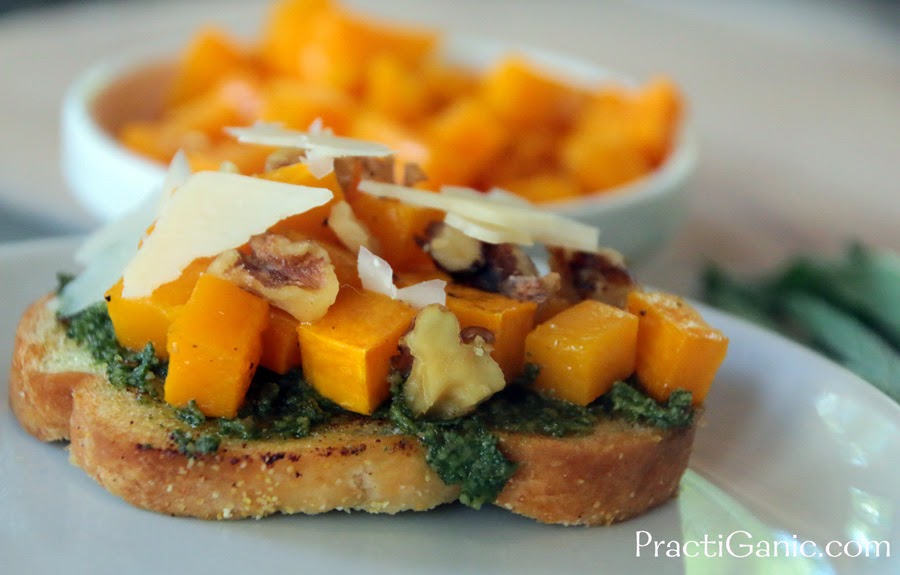
Butternut Squash, Walnut & Sage Pesto Bruschetta

Can I just say how much I love acorn squash? It seems so versatile and the squash flavor is so subtle as opposed to the in-your-face-flavor of the butternut squash. Can you tell I've never been a butternut squash fan?!? For me, squash and beets are a lot alike. I didn't like them as a kid, but beets I now love. I realized that was time to stop the nonsense and embrace this wonderful fall squash.

I recently found a love for sage pesto and I knew squash would be the perfect match. The appetizer was amazing! The squash tasted so good after it was roasted with a little salt and pepper, that I found myself to be munching on it when it came out of the oven. So, maybe I just don't like mashed squash with cinnamon on it. Surprise surprise, I should've known years ago that I would like it more savory than sweet!

I didn't use the whole squash so the extras were great for the kids side dish for dinner that night. Maybe they will now grow up to be squash lovers! I've also made this recipe with sweet potatoes instead of the squash ... not as great, but a  great substitute when you need one. 


Butternut Squash, Walnut & Sage Pesto Bruschetta

Butternut Squash, Walnut & Sage Pesto Bruschetta

Makes about 15

2 1/2 c butternut squash, peeled and cubed
3/4 walnuts, toasted
1/2 c sage pesto (recipe shown below)
Shaved Parmesan to top
1 loaf french bread, sliced about 1/2 in thick


**Ia have made these gluten free and vegan before using Udi's Bread and I simply omitted the cheese from the pesto and I used a vegan cheese to melt on the top.

Preheat oven for 300º.

Drizzle some olive oil over your bread and sprinkle garlic powder over them. Toast bread for about 7 minutes then flip and toast another 5. I don't like mine super crispy but you don't want it soggy so it can hold the bruschetta. Keep an eye on them so they don't burn.

Once toasts are out, raise oven to 375º. Drizzle a little olive oil on the squash and shake some salt and pepper on it. Bake for 20 minutes or until tender. Mix it with the walnuts.

Meanwhile, make your sage pesto.

To assemble, top your toast with pesto, then squash and walnuts and then sprinkle some shaved parmesan on the top. If you want, you can put them back in the the oven so the cheese melts a bit or just serve as is!

Butternut Squash, Walnut & Sage Pesto Bruschetta


Sage Pesto

Makes 2/3 cup

1 c sage, tightly packed
1/3 c grapeseed oil (olive oil will work just fine)
1/4 c toasted walnuts
1/4 c parmesan cheese
1 garlic clove
1/2 t lemon juice
1/4 t salt


*to make vegan use Cashew Parmesan or other vegan parmesan.

Put all ingredients into your food processor and mix until smooth. Add more oil if needed.


Sage Pesto

Wednesday, September 17, 2014

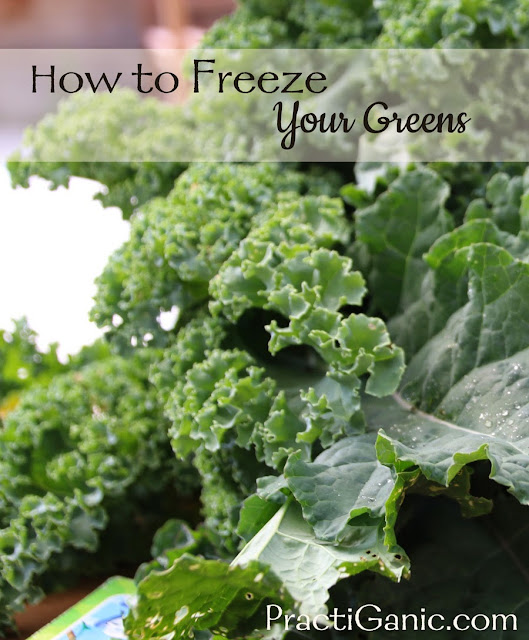
How to Freeze Kale, Spinach and Other Hearty Greens

Our kale plants are doing great right now, I can't keep up with the harvest! On top of that, we will get more kale every now and again from our CSA. This is a great problem to have! I've been substituting kale for spinach in almost all of my recipes, and as usual, kale is a staple in almost every juice we make.

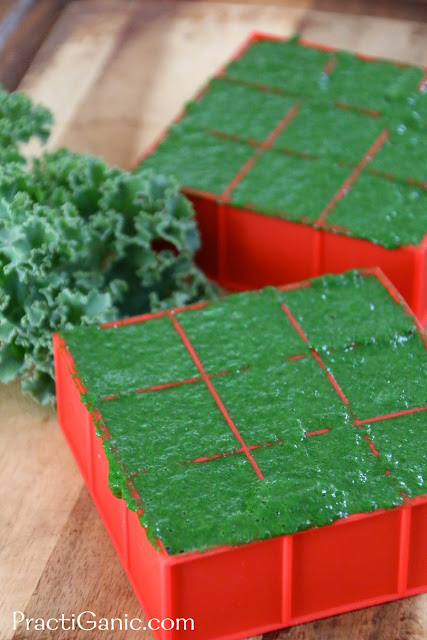
As I begin the think about the winter months and the fresh produce that we don't have from our backyard I realized I need to make process my kale now so that we can use it longer. Since we juice our kale all the time, why not juice it now to freeze and use it when our garden is covered in snow. This lightbulb moment is keeping me warm as I shiver thinking about snow!

I quickly realized that I should be doing this with all of my hearty greens that I have excess of. I think I need a chest freezer!


I'm excited to try out my Green Machine Brownies and other baking recipes this winter using my frozen kale cubes too! They don't have to be used for just juice.

How to Freeze Kale, Spinach and Other Hearty Greens


How to Freeze Your Greens

  • For Juice: Simply blend kale with water or aloe vera juice ... enough for your blender to be able to liquify the kale. Then, pour into 1 ounce freezer trays and freeze. When frozen, put kale cubes into freezer bags for storage.
  • For Cooking
    • Boil water in a large pot.
    • Tear washed greens into usable pieces. 
    • Boil for 5 minutes and drain.
    • Rinse with ice cold water to stop the cooking process. 
    • Squeeze out all extra liquid from your greens.
    • Pack in freezer bags for storage. It's best to measure first so you know what you have in the bag. I am putting two cups of greens per bag because that's a good amount for my families needs.

    How to Freeze Kale, Spinach and Other Hearty Greens

Monday, September 15, 2014

Chickpea and Kale Asian Rice

Per usual, we have too many projects to do and not enough time. I don't know if it's the change of seasons that we are now feeling the rush of fall 'to-dos', but it's getting to be crazy! Also, with the change of seasons I find myself wanting to live in the kitchen. I am quickly realizing that I love fall foods. The harvest is bountiful. Everything seems to be ready to pick, eat and be made. My kale, I can't keep up with ... what a great problem, right?

My problem is that there are too many things to do to spend too much time in the kitchen. I find myself making quick dinners so that I can spend time experimenting and making other fun foods ... also, I've done more canning this year than ever before which takes a bit of time! Paul always tries to ground me and tell me that we always will have too many thing to do and not enough time. It all goes along with having a family, owning a home, etc. I know he's right, but I still try to squuze 75 minutes into an hour!


Chickpea and Kale Asian Rice

Pasta dishes are my go-to for fast dinner nights. For some reason, I always tend to gravitate more towards pasta than rice and if I'm going to do a grain, I usually use quinoa. Because I've been doing quite a few quick dinners even I'm getting tired of pasta. Lately, I'm trying to get on a rice kick and to use more grains. The great thing about grain recipes is you can substitute them so easily with whatever you have in the pantry. Feel free to mix it up. I've made this recipe with quinoa, barley and farro before too.


Chickpea and Kale Asian Rice

Makes 3 cups

3/4 c jasmine rice, or other grain
2 T coconut or olive oil
2 garlic cloves, minces
3/4 c onion
2 c kale, packed
1 c chickpeas, cooked
3 T nut butter
3 T tamari
2 T toasted sesame oil
1/4 t crushed red pepper
1/2 t salt
1/4 t pepper


Make rice according to package directions.

Sauté garlic and onion in hot oil until the onion starts turning brown. Add kale and cook down until it has entirely wilted. Add in chickpeas.
In a separate bowl, mix together nut butter, tamari, toasted sesame oil, salt and peppers. When rice is done, mix in the dressing ingredients then fold into your vegetables.

Chickpea and Kale Asian Rice


Saturday, September 13, 2014

Roasted Red Pepper Recipe

I've never been a huge bell pepper fan. Frankly, I almost despise green peppers and red peppers seem to be there simply for texture or to add a little color. However, once I discovered roasted red peppers, my mind was changed on the about the over-hyped bell pepper ... the red ones anyways, I still don't have much use for green peppers except for veggie trays and sauces that is!


How to Roast Red Bell Pepper

Red peppers have such a wonderful flavor once they are roasted. It's a magical transformation!, but I found myself only buying them for special occasions or if I really wanted to make a certain recipe because they are actually quite expensive. As with most things in life, it's cheaper (and better) when made homemade, so I finally brought myself to make them at home. Once I was done, I remember kicking myself because it was so easy to do and the flavor was just as good as store bought roasted red peppers. Ah, the money that I wasted!

I remember a few years ago when I girlfriend was over and she commented, 'Sorry to distract you and make you burn your peppers.' After telling her I burned them on purpose, her mind was blown too. I hope you now get to enjoy homemade roasted red peppers, but don't kick yourself like I did, simply enjoy the flavor and self-satisfaction or doing it yourself!


How to Roast Red Peppers

  1. Turn your top broiler on.
  2. Trim your peppers cutting the seeds and veins out of the pepper.
  3. Lay peppers, skin side up, on a sheet tray that is lined with aluminum foil.
  4. Broil them until the tops are nice and burnt. You will think you want to take them out, but let the burn a bit ... TuPac said it best, 'the blacker the better, the sweeter the juice'. Just don't burn them to a crisp!
  5. Once they are nice and dark, remove them from the oven. Using a tongs, place them in an airtight container, and put them in the refrigerator for 15-20 minutes (tupperware works great). This will cool them down and sweat off the skin so it easily peels off the pepper.
  6. Once cooled, simply remove the outer peel off the pepper and enjoy!
How to Roast Red Bell Pepper
This is how your red peppers look when they are ready to come out of the oven.

How to Roast Red Bell Pepper
The skins will then peel right off after spending a little time in the fridge!


Thursday, September 11, 2014

Roasted Tomato Pizza and Marinara Sauce

Last year, I made a ton of salsa, but not enough marinara sauce. This year, I am stocking up on both, and since my basil plants are doing better than ever, my goal is working out really well for me! Last week, when my aunt gave me a bushel of tomatoes (I had to look up how much a bushel was ...  it's about 50 pounds!), let's just say I was a little overwhelmed on canning day so I wasn't paying attention to any sort of measurement. I was simply cooking and processing as fast as I could! After 8 quarts and 13 pints later ... tomatoes were all taken care of! It was a crazy morning.

The sauces that I made this year has been some of my favorite. Mow that my tomato-craze has cooled down and I had only a tomatoes left in the fridge and a few on my plants, it was finally time to put a recipe down on paper before the year goes by and I have to start from scratch again next year.


Roasted Tomato Pizza and Marinara Sauce

On my huge canning day, I blanched a peeled all of my tomatoes for the marinara sauce because I didn't have the oven space to roast them. However, since my mom got me on the kick of roasting my tomatoes for my salsa, I have been dying to try it out for my marinara sauce. I'm sure of all the purists out there would cringe that I leave the skins on, but the roasting flavor is simply amazing and it's half the work! I also doubt they would be able to tell the difference.

In the past, I have always used this amazing Italian Seasoning that I get from a local co-op. Knowing that all seasonings are so different in taste, I didn't want to go that route this year. I wanted this years sauces to really have that garden fresh taste so I wanted to use only fresh herbs for seasoning and I'm so glad I did. These beautiful tomatoes are still the star of sauce but the fresh herbs really make them shine!


Roasted Tomato Pizza and Marinara Sauce

Roasted Tomato Pizza Sauce

Makes 6 cups or 3 pints

4 lbs tomatoes
1 lg onion
1 lg green pepper
10 cloves garlic
1/3 c tomato paste
1/4 c basil
2 T oregano
2 T rosemary
1/2 t salt
1/2 t pepper


Rough cut tomatoes, onions and green peppers. I will leave them in 1 inch pieces. Place on a baking sheet with garlic cloves and cook at 400º for 30 minutes. They will start to be shriveling up a little by their skins.


Roasted Tomato Pizza and Marinara Sauce

Once they are out of the oven, put the vegetable mixture in a colander and lightly press them with a spoon. This releases a lot of the tomatoes excess liquid that will make your sauce soupy.


Roasted Tomato Pizza and Marinara Sauce

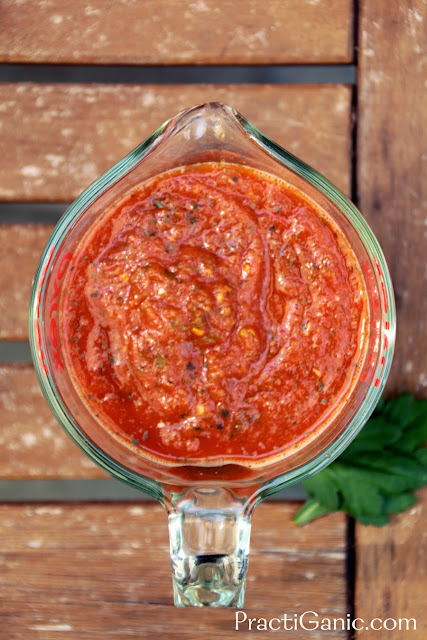
Next, place the tomato mixture  in a bowl with the your fresh and delicious herbs and mix with a immersion blender until all the vegetables are puréed. Taste and salt and pepper to your liking and enjoy!

Roasted Tomato Pizza and Marinara Sauce

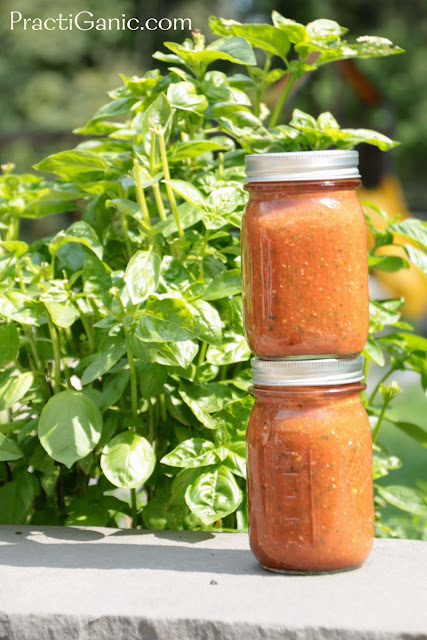
If you are planning on canning them, simply put the sauce in a pot and bring it to boil. Then, 
divide it into sterilized pint or quart mason jars leaving 1/2 in of head space. Put the jars in a canner and keep them covered with at least 1 inch of boiling water. Process the jars in a boiling-water bath for 15 minutes for pints and 20 minutes for quarts.

Roasted Tomato Pizza and Marinara Sauce


Wednesday, September 10, 2014

Wine Braised Mushrooms Over Orzo Pasta

I don't know what it is about red sauces, I love the taste of them but I very rarely make them. I always opt for an olive oil or white sauce, especially in summertime. Red sauces seem so rich and wintery. Also, if I'm having pasta, I feel an olive oil or white sauce seems lighter. Yes, I know this is all in my head, but I'm the cook so I get to have the strange excuses!

As I said last week, I have been a braising fool since I started making Beer Braised Mushrooms. I had to go the next route and use white wine too. It is perfect for another non-red pasta sauce.

Not only was this really easy to make ... very few vegetables to chop and only two pots to clean-up, but it tasted gourmet. Sorry, the pictures just don't do it justice. The mushrooms were so flavorful and the toasted walnuts added a great texture and flavor. I love braising! This made a pretty big serving for two people but Paul and I ate the whole thing.


Wine Braised Mushrooms with Orzo Pasta

Wine Braised Mushrooms Over Orzo Pasta

Makes 2 large helpings or 4-5 sides

1/2 c orzo
2 T butter
1/2 onion, diced
2 cloves garlic, minced
1 lb small portobella mushrooms, sliced
3/4 t salt
1/4 t pepper
1 1/2 c white wine
1/2 c vegetable broth
2 T flour
1.2 c red pepper, diced
1/2 c toasted walnuts, chopped  (optional)
1/2 c parmesan cheese, (optional)


In a pot, cook orzo according to directions. Mix with touch of oil when done so they don't stick together.

In a pan, melt butter then add onion and garlic. Sauté for 4-5 minutes or until onions are becoming translucent. Add your mushrooms, salt and pepper and cook for 6-8 minutes or until they are tender and turning brown. Add in white wine and cook for 8 minutes.

In  a cup, whisk together your vegetable broth and flour. Add this to your mushrooms and cook for another 4-5 minutes or until the sauce thickens.


Wine Braised Mushrooms with Orzo Pasta

You can either mix all ingredients together to serve or first plate your pasta, then top with mushrooms, raw red peppers, toasted walnuts and parmesan cheese for garnish.

Wine Braised Mushrooms with Orzo Pasta

Monday, September 8, 2014

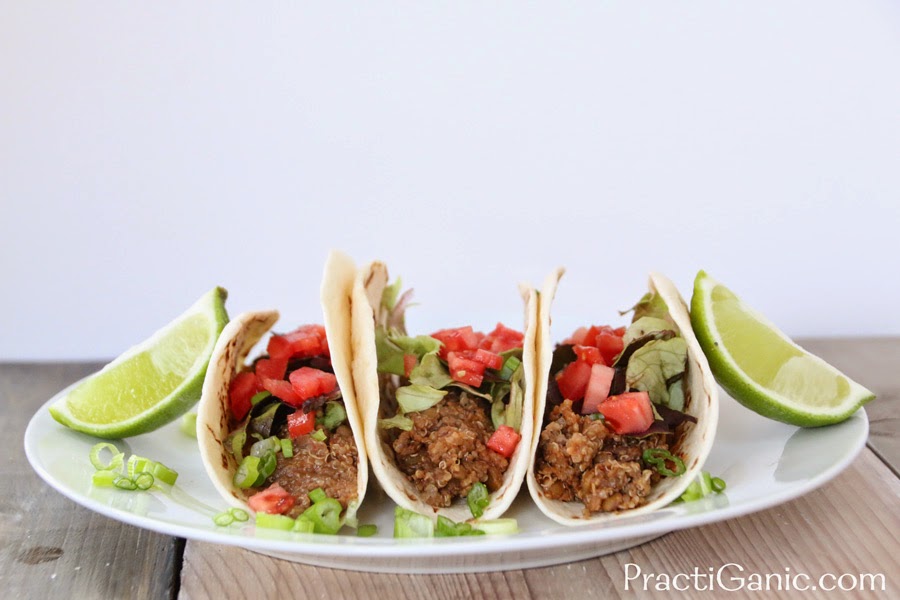
Slow Cooker Lentil and Quinoa Tacos

When having large parties, I want all the food to be done and taken care of so I don't have to worry about a thing when people are here. Nothing is worse then doing a million dishes when I want to be relaxing with my guests. Last weekend, it was Simon's baptism. We did it on Saturday night which makes it fun to have a little dinner celebration afterwards, however, we weren't going to get back from mass until almost 6. By that time, the kids were going to be really hungry.

I decided to do a taco bar because I could have everything done, cut and in bowls or crock-pots when we got back ... simply open the fridge, take the lids off the bowls and serve. I never made a crock-pot taco 'meat' before and I didn't want to chance it on a night when I was serving 30 people and it wouldn't be done in time. Luckily, we had a party a few weeks back for me to test a recipe on.

Slow Cooker Lentil and Quinoa Tacos went over great at both parties. I served them with flour tortillas and as well as tortilla chips, corn salsa, spanish rice, black olives, chopped kale and cheese.

The taco 'meat' froze very well too, so make a double batch and have it ready for next time! This is perfect football party food. Does it get any easier?!?


Slow Cooker Lentil and Quinoa Tacos

Slow Cooker Lentil and Quinoa Tacos

Makes 6 cups

1 c lentils
1/2 c quinoa
1/2 onion, chopped
4 cloves garlic, minced
2 T tomato paste
1 t chili powder
1 t cumin
1 t paprika
1 t oregano
1 t coriander
1 t salt
3/4 t pepper
4 c water


Put all ingredients into a crock-pot (use at least a 1.5 quart slow cooker). Cook on low-medium heat for 6 hours. Mix it up a couple times if you are available.

Serve with the toppings of your choice.

Slow Cooker Lentil and Quinoa Tacos

Friday, September 5, 2014

Mint Chocolate Ricotta Mousse

Recently, I got to go to the grocery store on my own! I found myself wondering the aisles, looking around and taking my time. ... checking labels and ingredients. It was amazing, but slightly dangerous. With three rambunctious kids, I usually run through the store with my list and don't stray at all. It's a race to get in and out as fast as can be. This trip, I was making unneeded purchases. Oops.

One of them was a container of ricotta. I bought it thinking that we hadn't had lasagna in a while and we could use one. A week went by and I was still in no mood for lasagna, but I really wanted to use the ricotta. Luckily, we had my cousins coming over for dinner and I needed a dessert. I remembered I had the ricotta. I had dreams of doing a cheesecake or a crepe filling. As usual, time got the best of me and I completely ran out of it. Did I need to make a dessert? No, but it was on my mind and I really wanted it so I had to find a little time and rethink my dessert but I was stuck on wanting to use the ricotta as my focus of the dessert.

Mint Chocolate Ricotta Mousse

I figured I could do some sort of pudding with the ricotta that was dying to be used. I had chocolate in the pantry so I knew I was in business ... a little mint from the garden ... check! I had a dessert and it took about 10 minutes from start up to clean up. Perfect! However, it wasn't much of a pudding, it was more of a decedent mousse.

I served four people with it and I thought the serving size was a little small, but by the time I was done I realized I didn't need the whole serving so I think you could stretch it to 6 servings if you wanted a lighter dessert or served it with a cookie or cake.


Mint Chocolate Ricotta Mousse

Mint Chocolate Ricotta Mousse

Serves 4-6

1 15-ounce container ricotta
2 tablespoons honey
5 ounces bittersweet chocolate
1 T mint leaves


*To make vegan, use vegan ricotta, maple syrup and vegan chocolate chips.

In a saucepan, melt chocolate making sure it doesn't burn. Use a double boiler if you feel confident with it. Next, combine all ingredients and mix them in your blender or use a immersion blender.

Chill for at least 2 hours before serving.

Mint Chocolate Ricotta Mousse